ADBMB001 Smart Roller Blind User Manual
User Manual

English

Model: ADBMB001
Product Name: Smart Roller Blind
Platform: Tuya Smart · Smart Life App
The Smart Roller Blind upgrades bead-chain roller blinds into smart blinds that can be controlled through the Smart Life App. After installation and calibration, you can open, stop, and close the roller blind from your phone, adjust the blind position by percentage, and set countdown or schedule tasks.
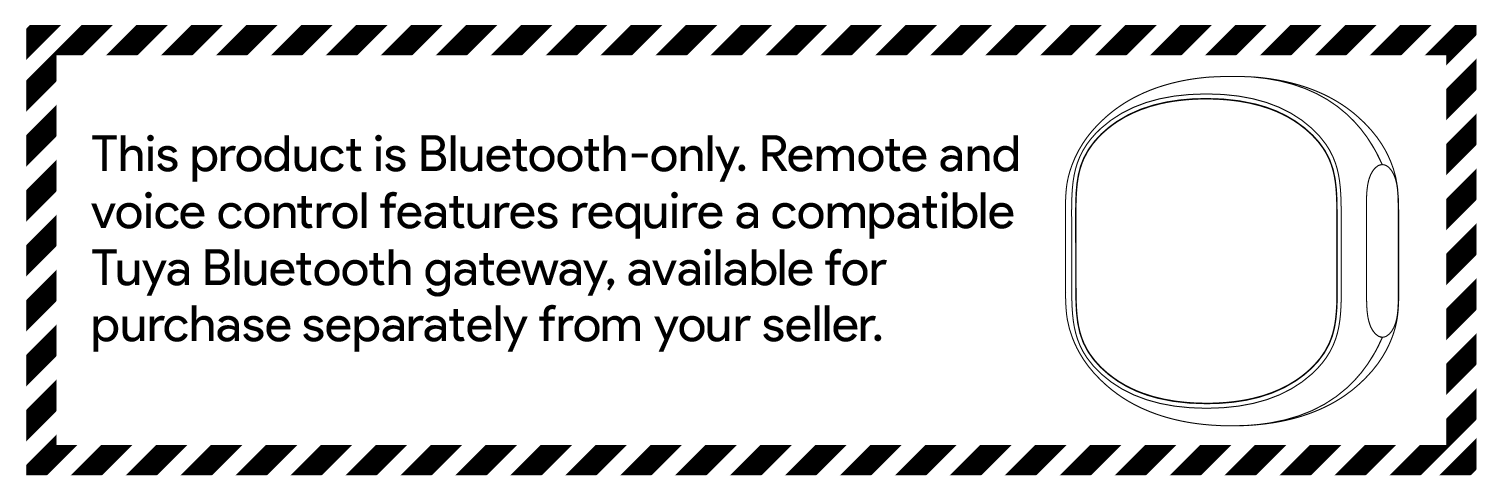
This product uses a Bluetooth 5.0 low-power connection. When your phone is within Bluetooth range, you can control the device directly through the Smart Life App. For remote control, voice control, or more stable automation, use it with a Tuya Bluetooth gateway.
App control: Supports open, stop, and close
Percentage control: Supports 0-100% target position adjustment
Travel calibration: Calibrates the open and close endpoints after initial installation by following the App guide
Open/close direction setting: Supports adjusting the blind closing direction based on the installation direction
Countdown: Supports 1 countdown task
Schedule: Supports up to 4 local weekly schedules
Battery display: Supports battery level reporting
Charging status: Supports not charging, charging, and fully charged status display
Local buttons: Supports local open, close, stop, and factory reset
Smart Roller Blind main unit × 1
Screws × 2
Foam pads × 2
Smart Life App / electronic manual QR code card: To be confirmed by packaging
Type-C charging cable: To be confirmed by packaging
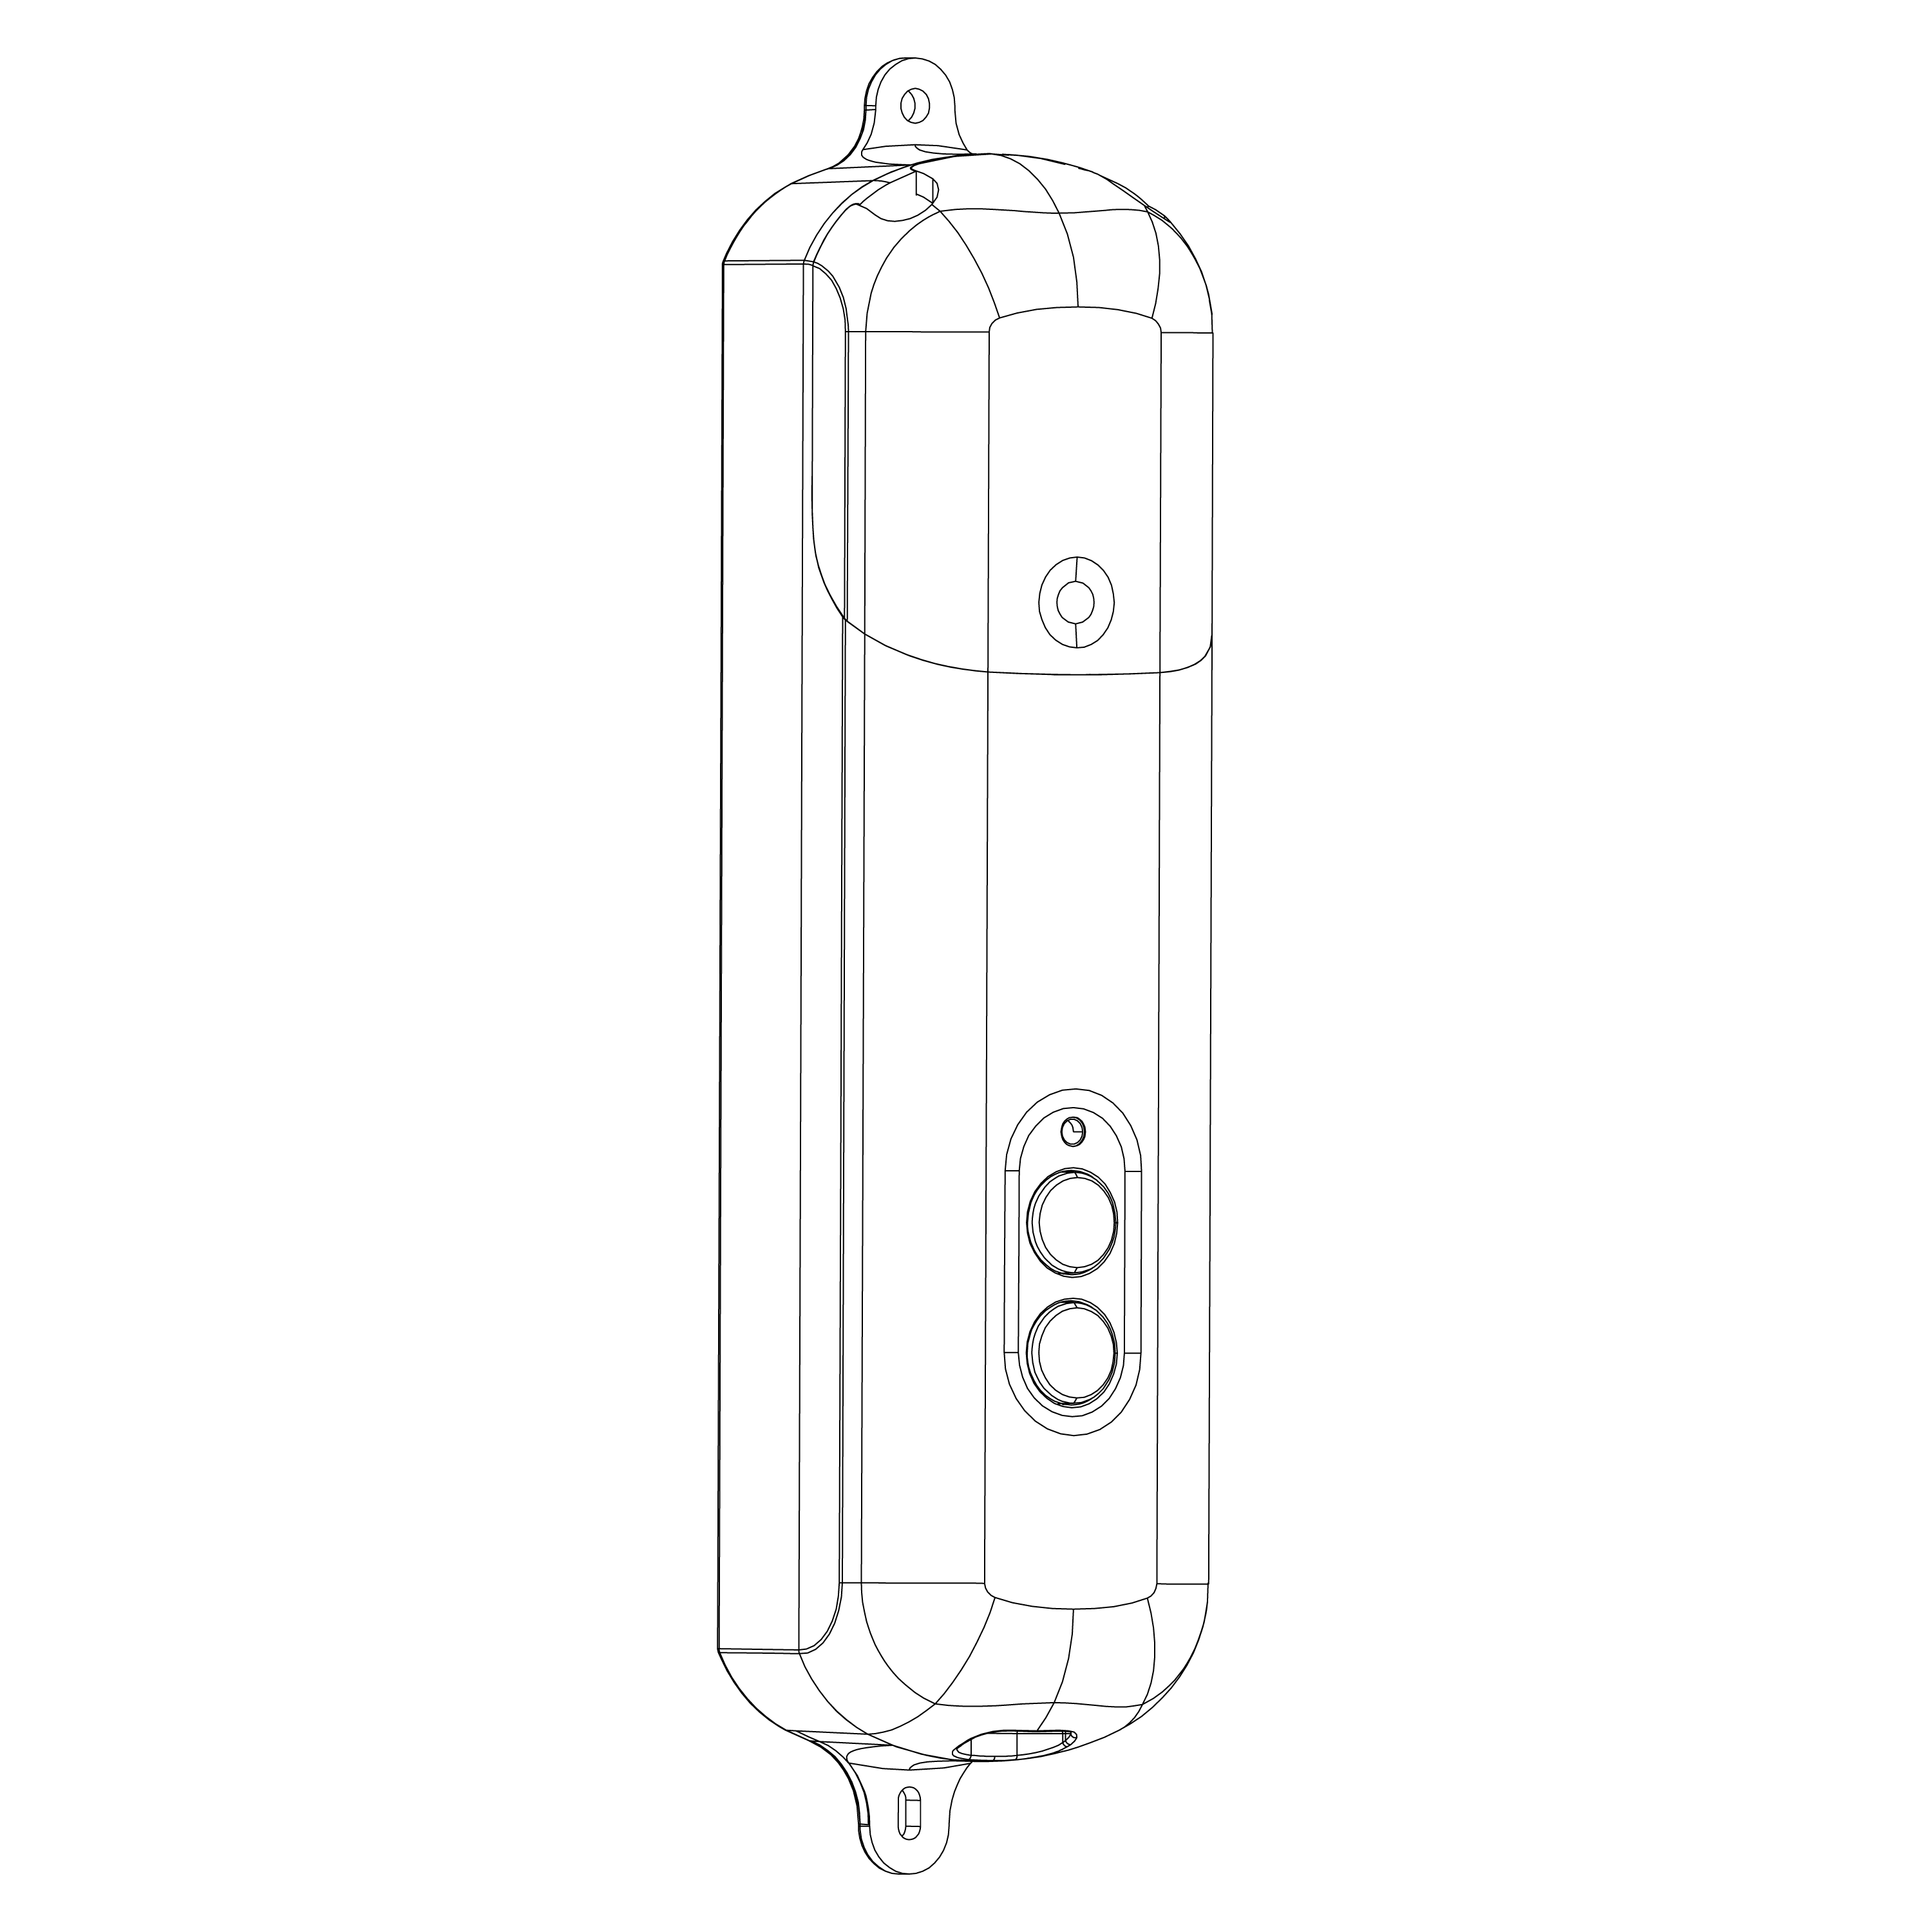
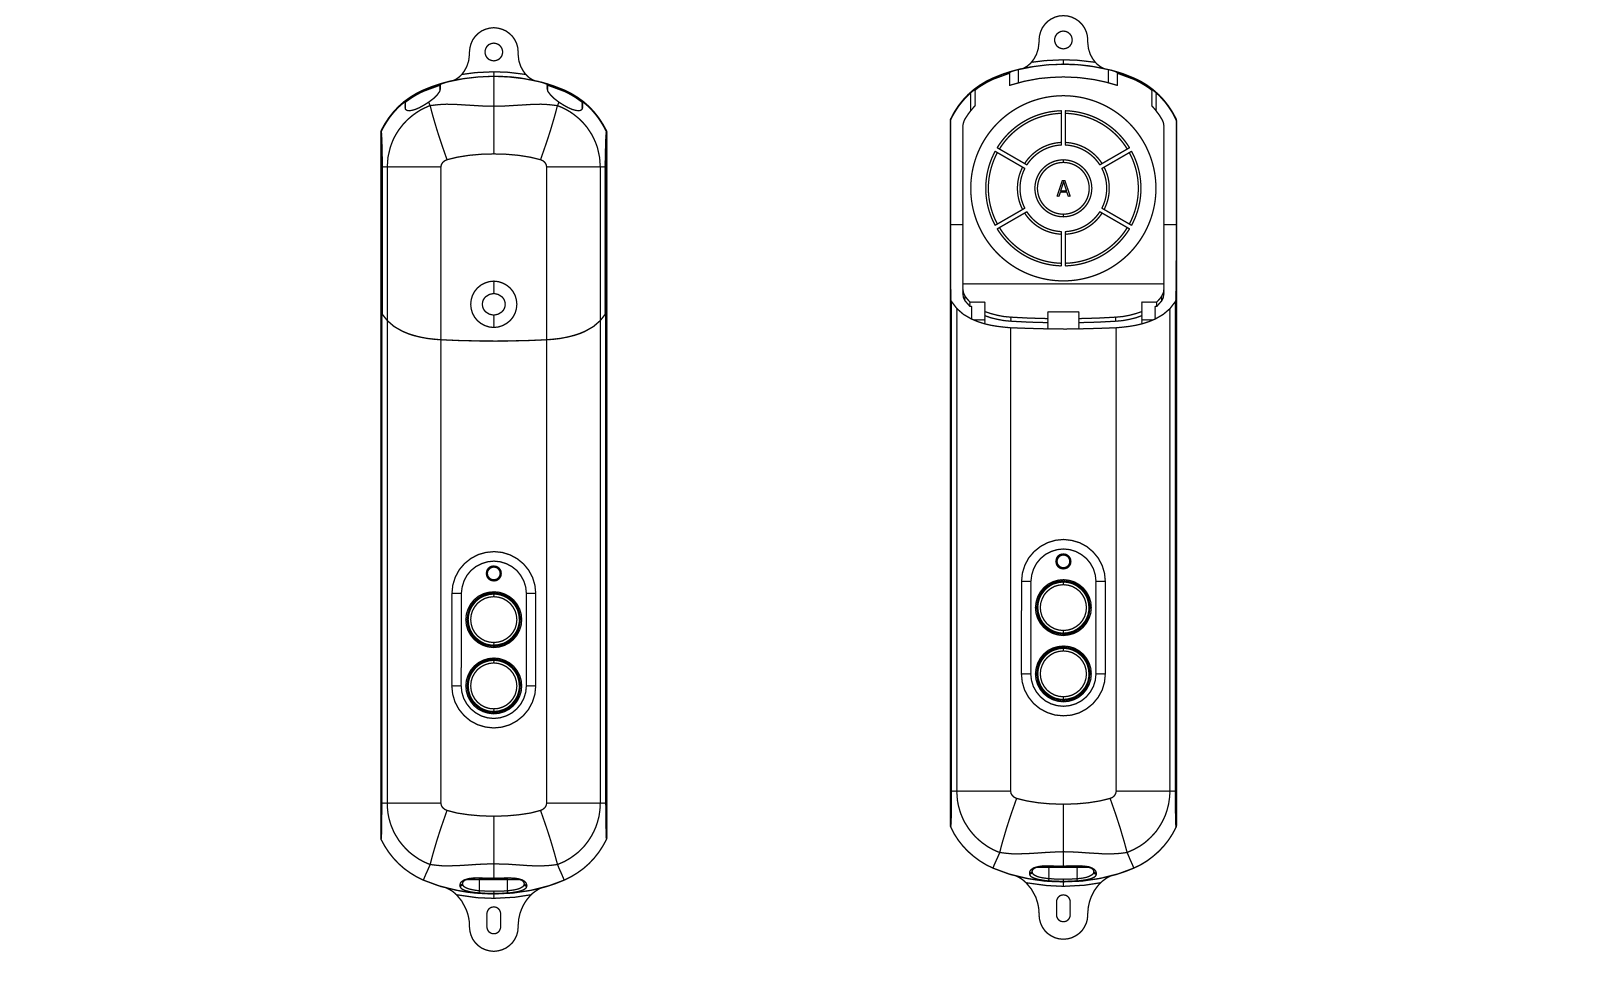
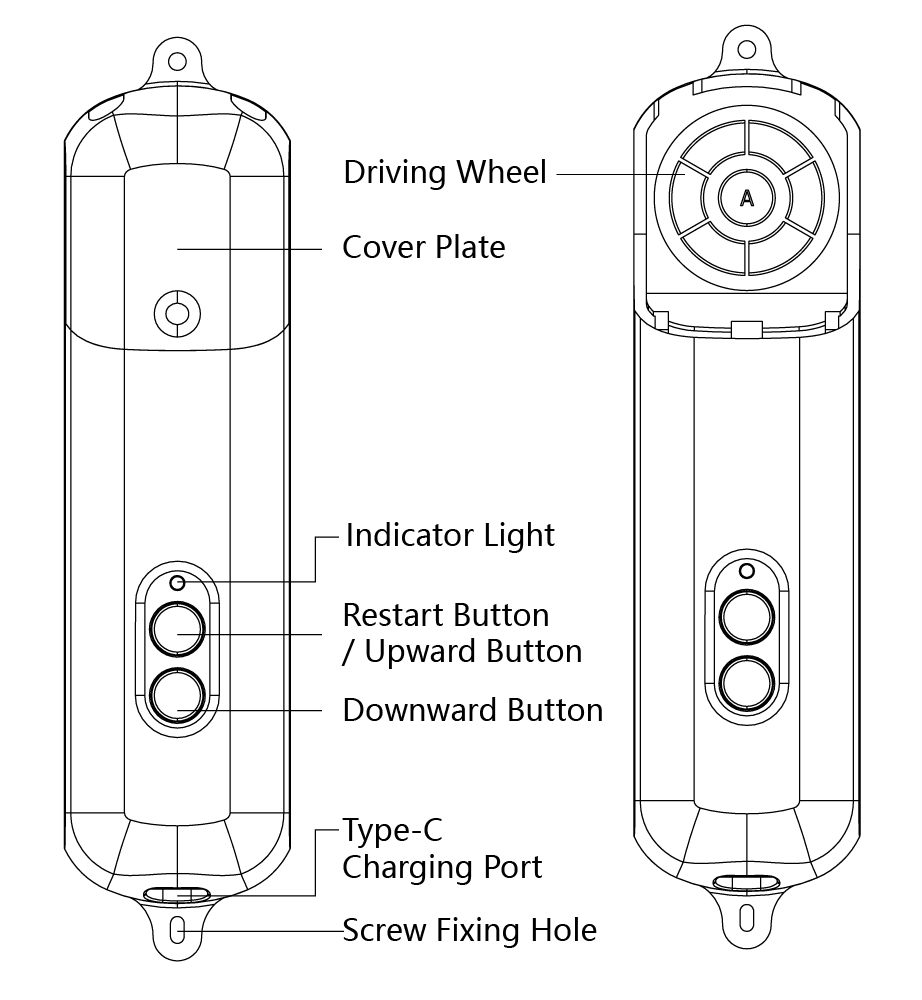
Drive wheel: Connects to the bead chain and drives the roller blind to open or close
Type-C charging port: Used to charge the device
Blue indicator: Shows pairing, operation feedback, and charging status
Open button: Press once to open; press once during movement to stop
Close button: Press once to close; press once during movement to stop
Button near the indicator: Press and hold for about 5 seconds to reset / enter addable state
Use a Type-C charging cable to connect the device, and charge it with a DC 5V/1A power adapter. Do not use visibly damaged cables or adapters.

Addable / pairable: Blue light flashes
Charging: Blue light breathes / flashes; actual effect is subject to the physical product
Fully charged: Blue light stays on
Not charging and no operation: Blue light turns off
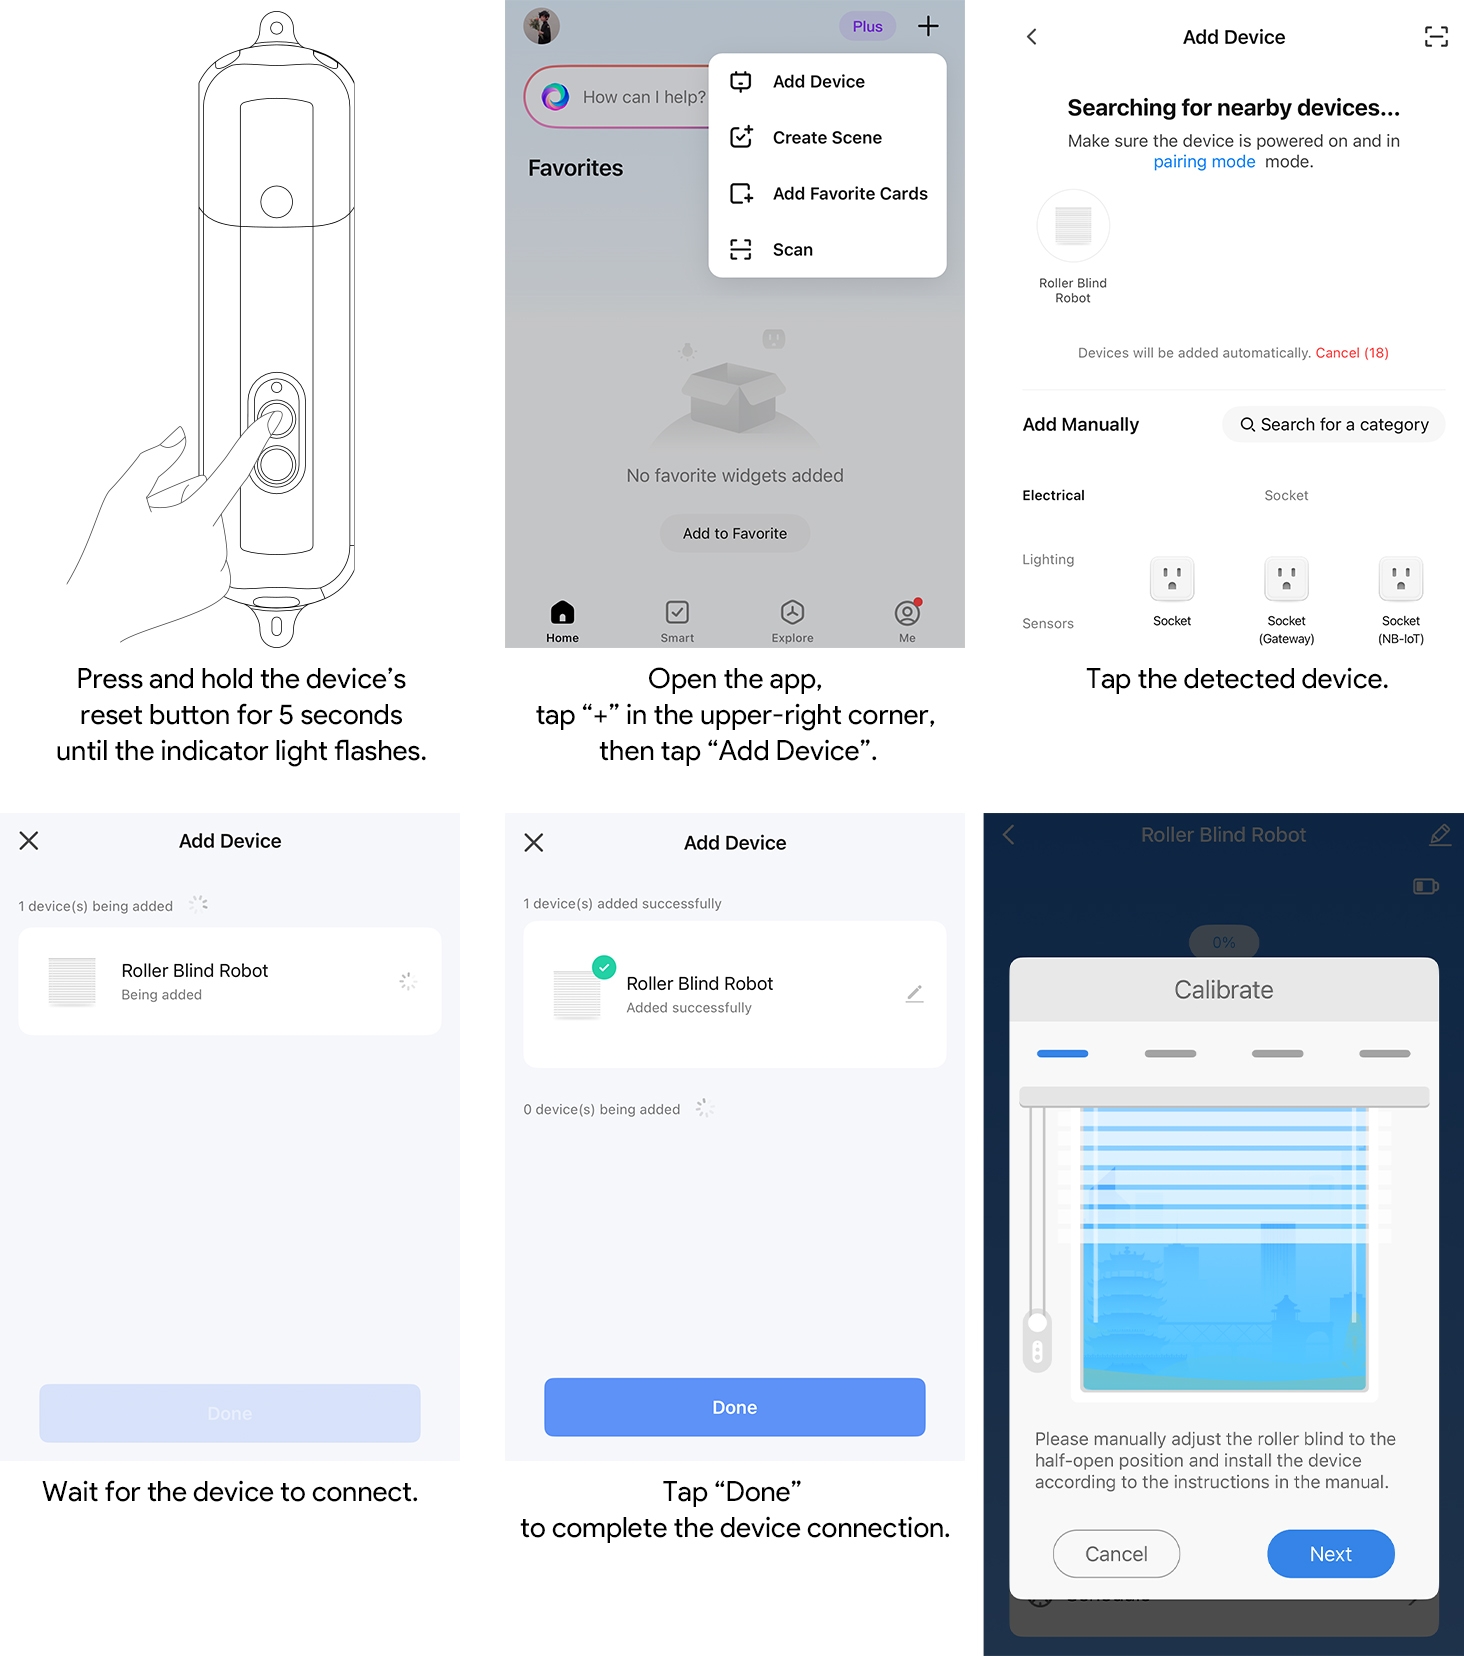
The device may be in sleep mode when shipped from the factory. Before first use, press and hold the button near the indicator for about 5 seconds until the indicator turns on or the blue light starts flashing. The device is then activated and can be added to the Smart Life App.
Search for “Smart Life” in your phone’s app store and install the App. After installation, follow the on-screen instructions to log in or create an account.


Press and hold the button near the indicator for about 5 seconds until the blue light starts flashing. A flashing blue light means the device is in addable state.
1. Open the Smart Life App and tap “+” in the upper-right corner of the home page.
2. Tap “Add Device”.
3. Select “Roller Blind” from the discovered devices.
4. Tap “Add” and follow the on-screen instructions to complete binding.
• Before installation, confirm the following:
• The roller blind uses a bead-chain structure.
• This product does not support cord-operated blinds.
• The bead chain moves smoothly, without obvious jamming, knotting, or looseness.
• The mounting surface is clean, flat, and free of dust.
• The product drive wheel can connect tightly with the bead chain to prevent slipping during operation.
• There are no obstacles in the movement path of the roller blind.
1. Unbox and check whether the main unit, screws, foam pads, and other accessories are complete.
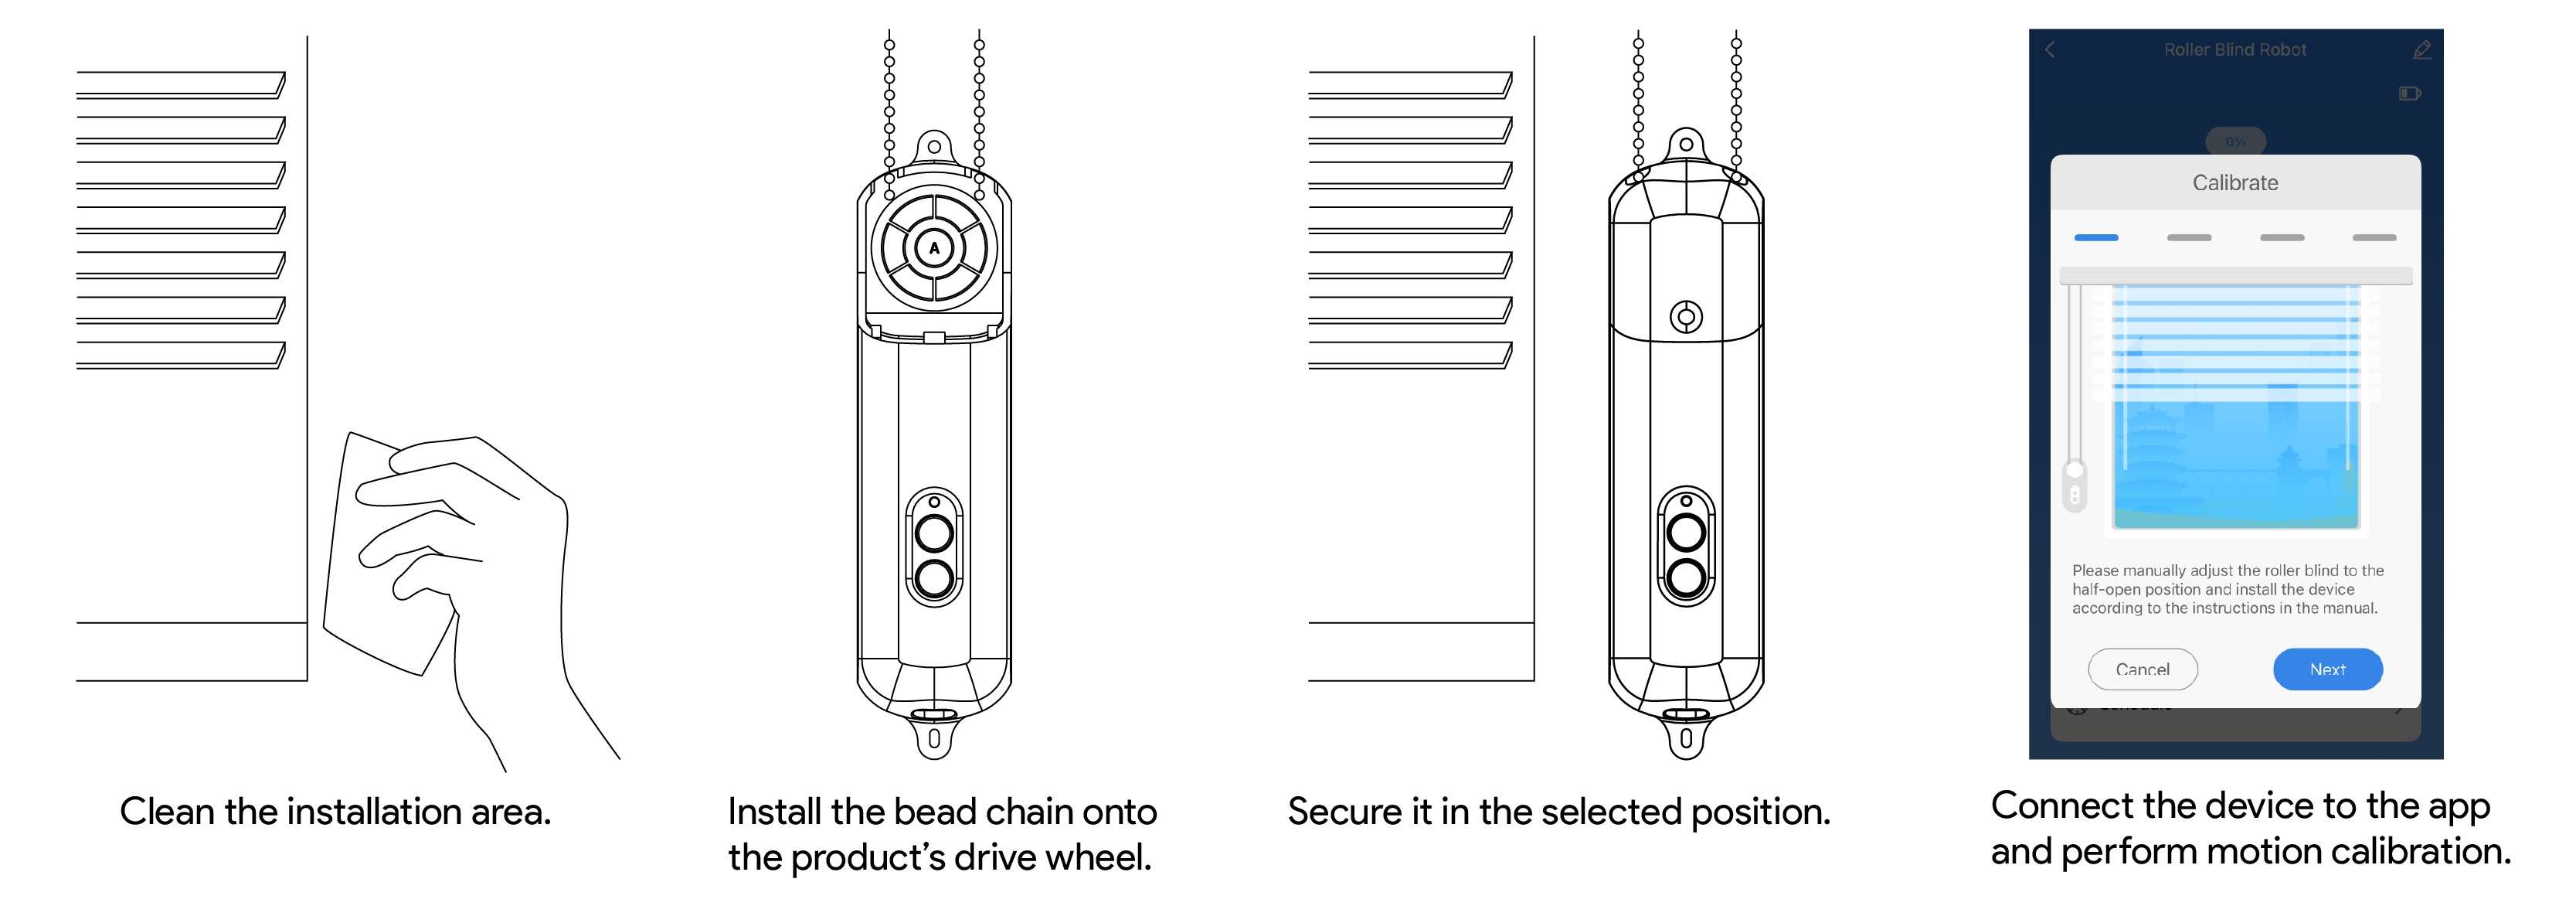
2. Clean the installation position and make sure the surface is clean and dust-free.
3. Connect the product drive wheel to the bead chain and make sure the connection is secure.
4. Use the included screws or mounting accessories to firmly install the main unit in the selected position.
5. After installation, open the device panel in the Smart Life App and perform motion calibration.
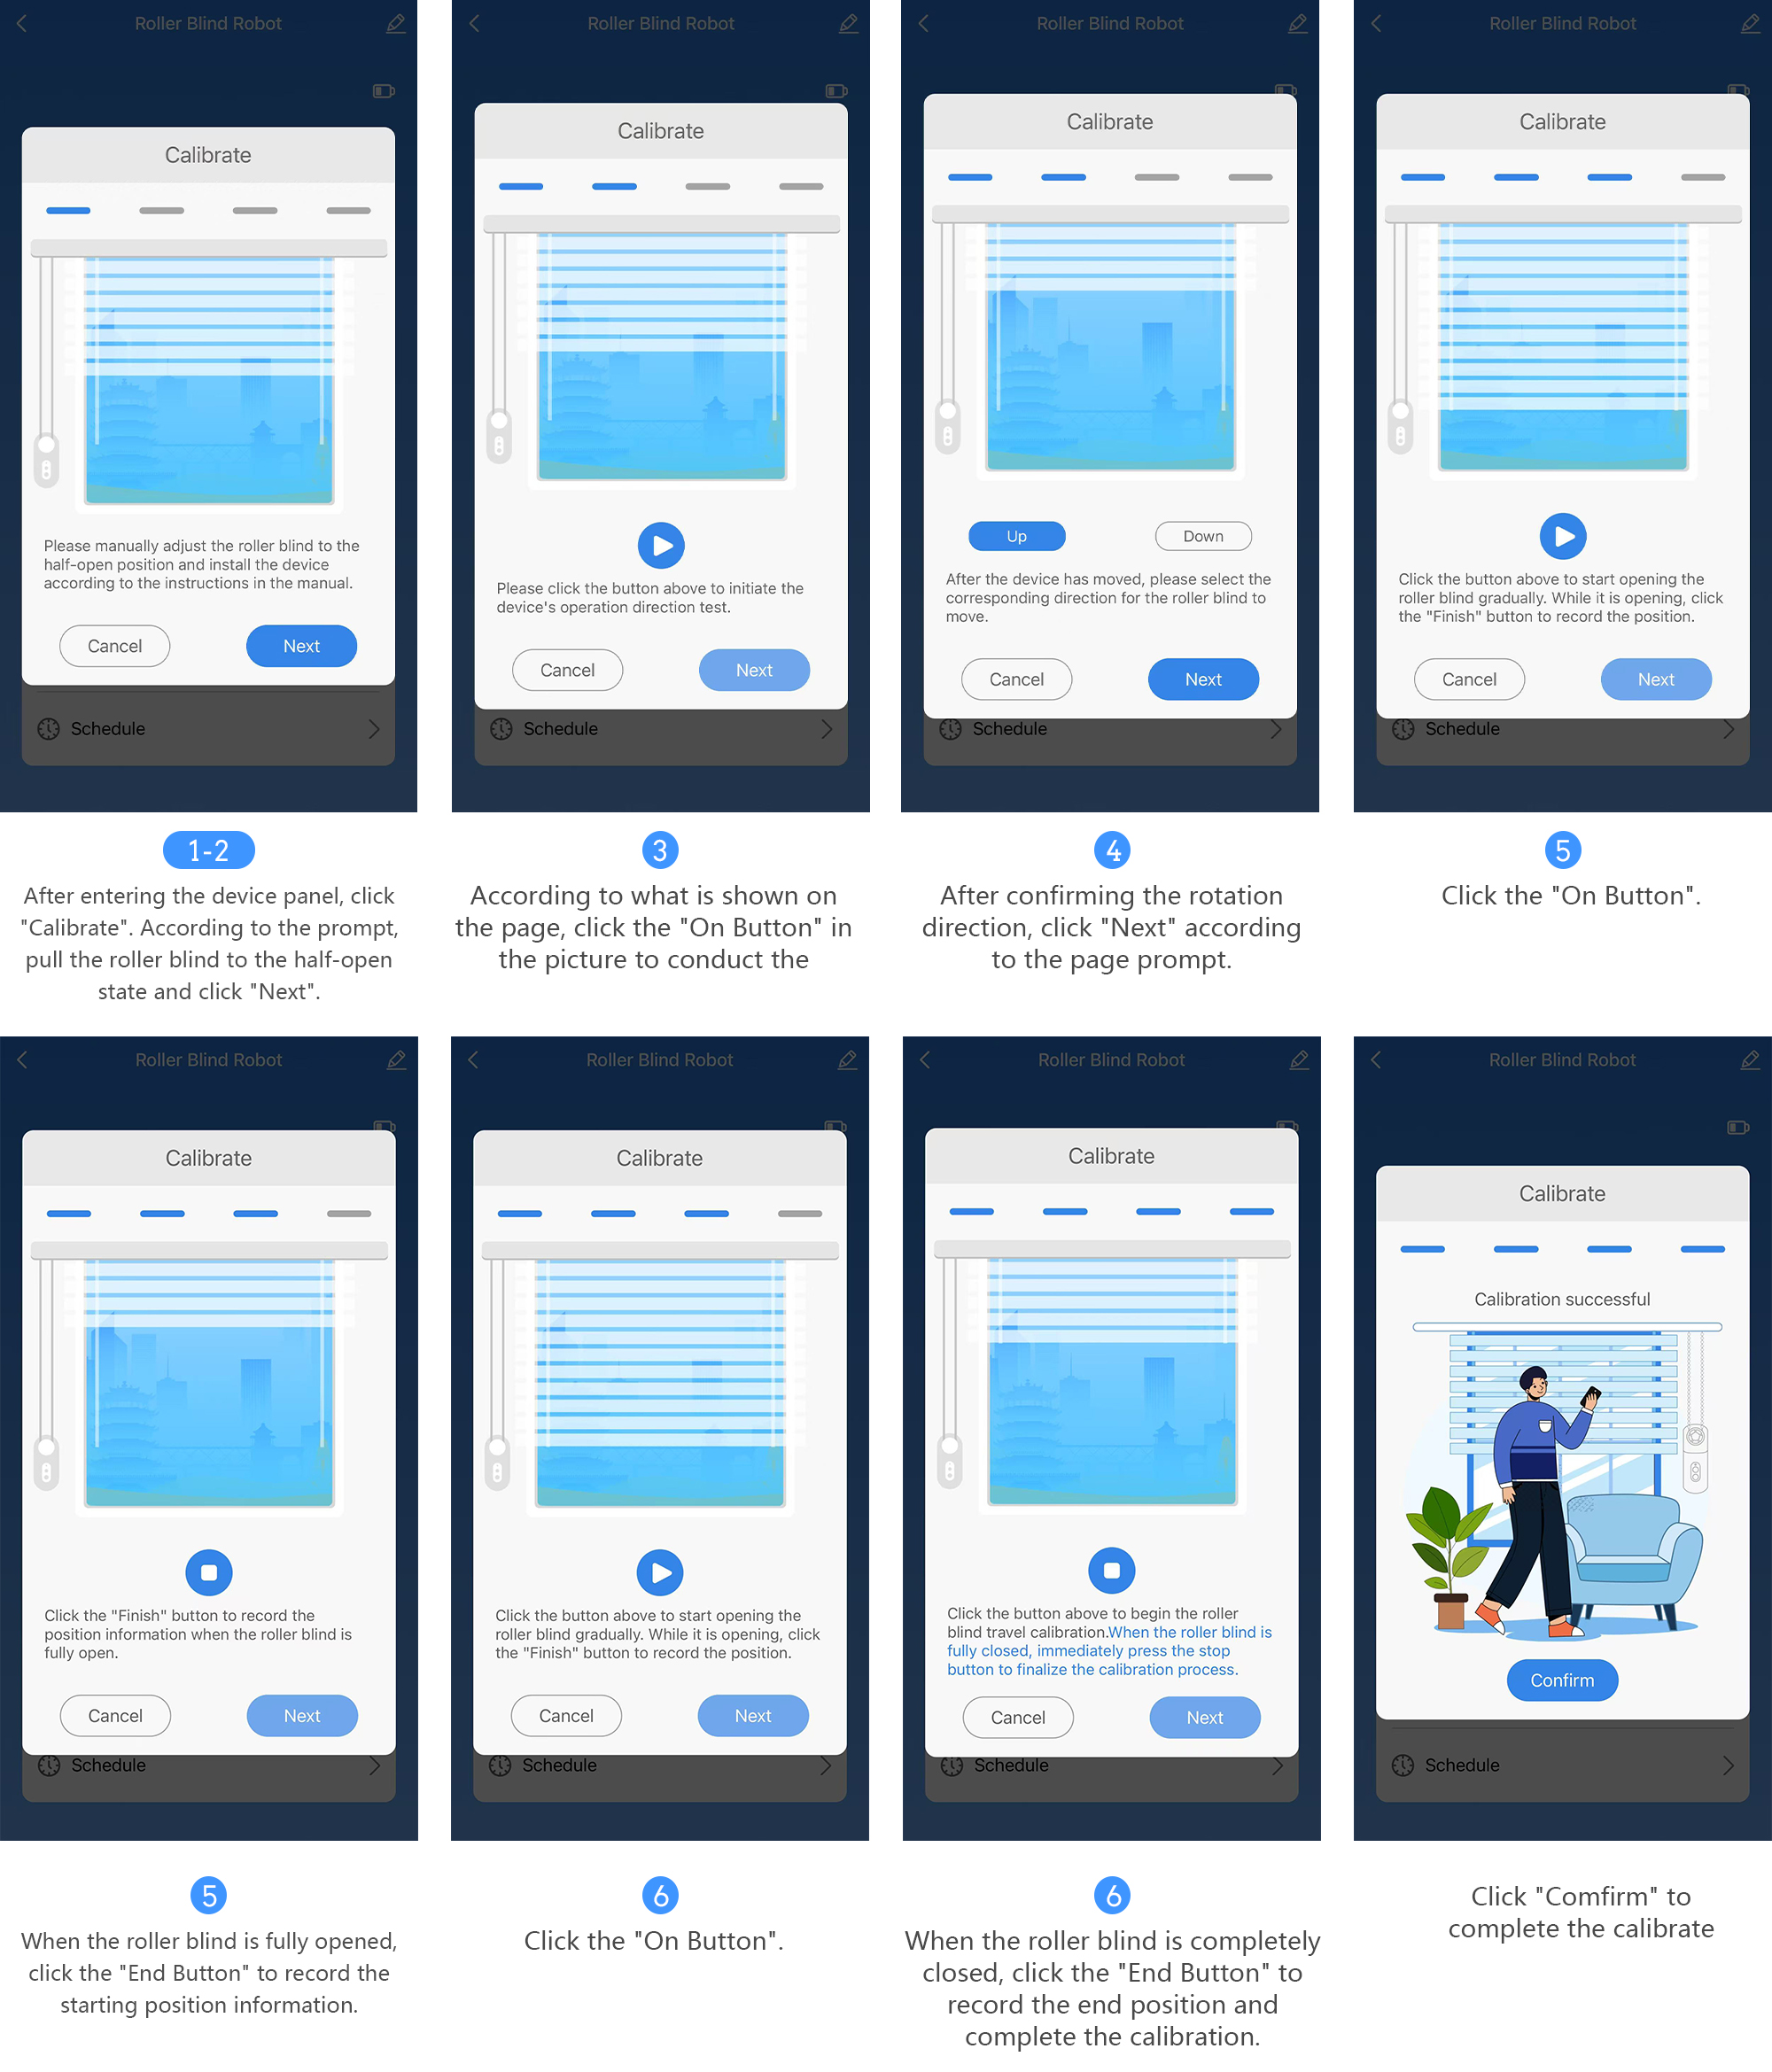
After first installation or reinstallation, complete motion calibration before use. Before calibration, percentage position and schedule control may be inaccurate.
1. Open the device panel and tap “Motion Calibration”.
2. Follow the on-screen instructions to move the roller blind to a half-open position, then tap “Next”.
3. Tap the “Open” button on the page to test the direction.
4. Confirm the rotation direction, then tap “Next”.
5. Tap the “Open” button. When the roller blind is fully open, tap “End” to record the start position.
6. Tap the “Start” button. When the roller blind is fully closed, tap “End” to record the end position.
7. After calibration is complete, you can normally use open, close, percentage control, and schedule functions
If calibration fails or the operating position is inaccurate, check whether:
• The roller blind is blocked by foreign objects.
• The bead chain is slipping, loose, or tangled.
• The device is firmly installed.
• The roller blind moves smoothly.
• After troubleshooting, perform motion calibration again.
Note: After installation and calibration are complete, do not manually pull the roller blind or bead chain, as this may affect travel position and calibration results.
After entering the device panel, you can use the following controls:
Open: The roller blind moves in the opening direction
Stop: The roller blind stops the current action
Close: The roller blind moves in the closing direction
Percentage adjustment: Moves the roller blind to a specified percentage position
Open/close direction: Sets the closing direction based on the installation direction
Countdown: Sets a one-time delayed open or close task
Schedule: Sets up to 4 weekly repeating tasks

This manual currently describes the logic as follows: 0% means fully open, and 100% means fully closed. If the final App panel uses a different display logic, refer to the actual panel.
Press the Open button once: Opens; press once during movement to stop
Press the Close button once: Closes; press once during movement to stop
Press and hold the button near the indicator for about 5 seconds: Restores factory settings / re-enters addable state
After calibration, you can create scenes or automation in the Smart Life App, for example:
• Open or close the roller blind at a fixed time every day.
• Run “fully open” or “fully close” with one tap.
• Use remote scene control after pairing with a Bluetooth gateway.
This product is a BLE device. When your phone is within Bluetooth range, you can control it directly through the Smart Life App.
For remote control, voice control, or keeping the device online in the cloud, an additional Tuya Bluetooth gateway is required. After the Bluetooth gateway is connected to the home network, this product can be relayed through the gateway and supports:
• Viewing and controlling the device remotely through the Smart Life App.
• Creating more stable automation.
• Using voice control after linking supported voice services in the App settings.
Product model: ADBMB001
Product name: Smart Roller Blind
Product English name: Smart Roller Blind
Dimensions: 209 × 52 × 38 mm
Weight: 260 g
Wireless protocol: Bluetooth 5.0
Battery type: 3.7 V lithium battery
Battery capacity: 2000 mAh
Charging port: Type-C
Power input: DC 5V/1A
Compatible type: Bead-chain roller blinds; cord-operated blinds are not supported
Opening/closing method: Up-and-down opening/closing
Operating temperature: 0°C~45°C / 32℉~113℉
Operating humidity: 0~95% RH, non-condensing
Cloud platform: Tuya Smart IoT Platform
• This product is not waterproof. Do not use it in humid, splashing, or condensation-prone environments.
• This product contains a lithium battery. Do not use, charge, or store it in high-temperature environments.
• Do not block the movement path while the device is operating, otherwise the internal mechanical structure or motor may be damaged.
• Do not disassemble, modify, or repair this product by yourself.
• If the device shows abnormal heating, odor, water ingress, housing damage, or abnormal operation, stop using it immediately.
• This product is intended only for auxiliary control of household roller blinds. It must not be used in medical, industrial, fire safety, emergency escape, or other critical scenarios involving personal safety.
• The package and accessories contain small parts. Keep them out of reach of children.
• Children are not recommended to install, charge, or operate this product by themselves.
• Prevent children from pulling the roller blind bead chain or playing with the device’s moving parts.
• Use a compliant 5V/1A power adapter.
• Do not use damaged, aged, or loose charging cables.
• Keep the environment ventilated during charging, and keep the device away from heat sources and flammable materials.
• Do not throw the product into fire, crush it, puncture it, or disassemble the battery.
• Bind the device with a Smart Life App account trusted by you or your family members.
• When multiple people use the device, authorization through the App’s family member function is recommended. Avoid directly sharing account passwords.
• Before unbinding or transferring the device, remove it from the App first, then press and hold the button for about 5 seconds to make the device re-enter addable state.
Make sure the blue indicator is flashing, then move your phone closer to the device and try again. If it still cannot be added, press and hold the button near the indicator for about 5 seconds, wait until the blue light flashes again, and add it again.
This product is a BLE device. When used alone, it mainly supports control within your phone’s Bluetooth range. For remote control, use it with a Tuya Bluetooth gateway and make sure the gateway is connected to the network normally.
Open the open/close direction or motion calibration settings in the device panel, adjust the direction as prompted, and recalibrate.
Perform motion calibration again. Before calibration, make sure the roller blind is not blocked, the bead chain does not slip, and the main unit is firmly installed.
Stop operation immediately and check whether the blind track, bead chain, or installation position is blocked, tangled, or loose. After resolving the issue, recalibrate the device.
Check whether the Type-C charging cable and 5V/1A adapter work normally, and whether the connector is firmly inserted. If there is still no response after replacing the cable and adapter, stop using the product and contact after-sales support.