Curtain Robot Roman Rod ADCBPL02
User Manual

English

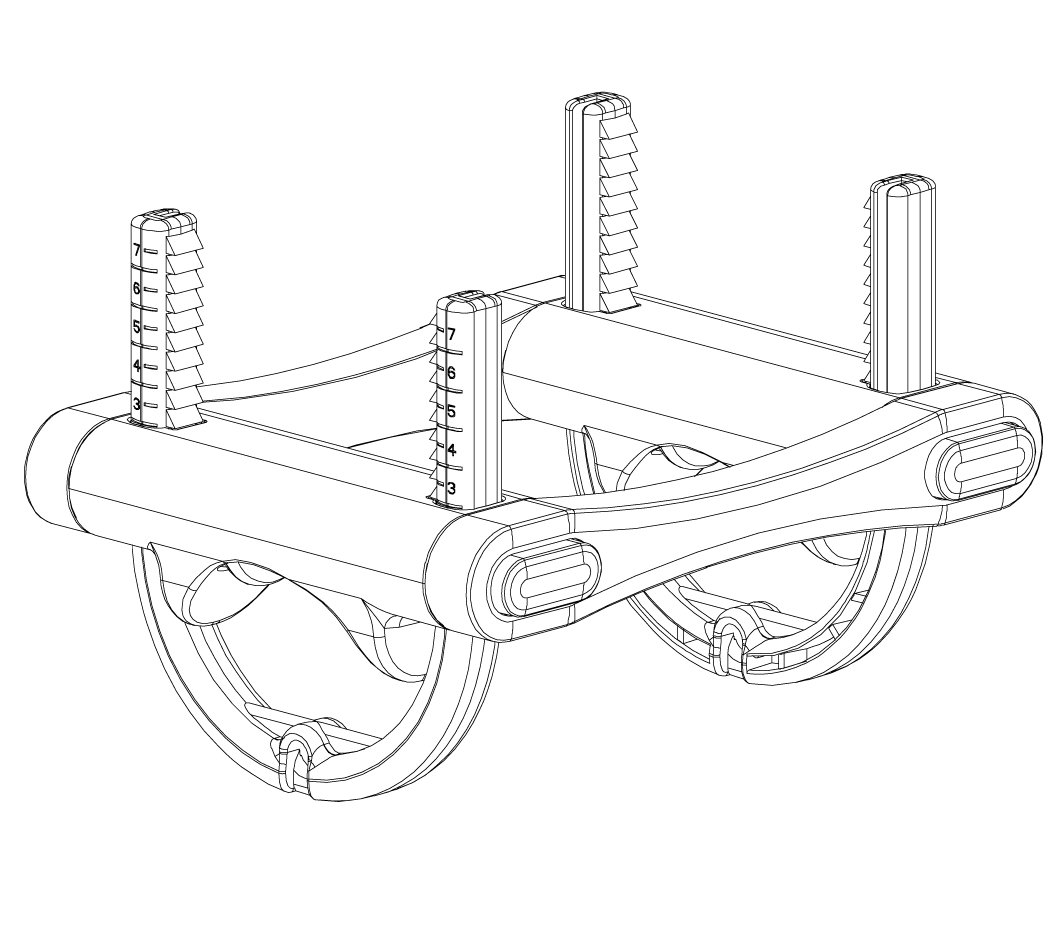

The Curtain Robot Roman Rod Accessories are designed to optimize the smart automation experience of Roman rod curtains, compatible with both through-type and hang-through curtain fabrics. This accessory balances aesthetics and functionality, offering flexible installation solutions for different types of curtain fabrics, enhancing the convenience and comfort of smart home living.
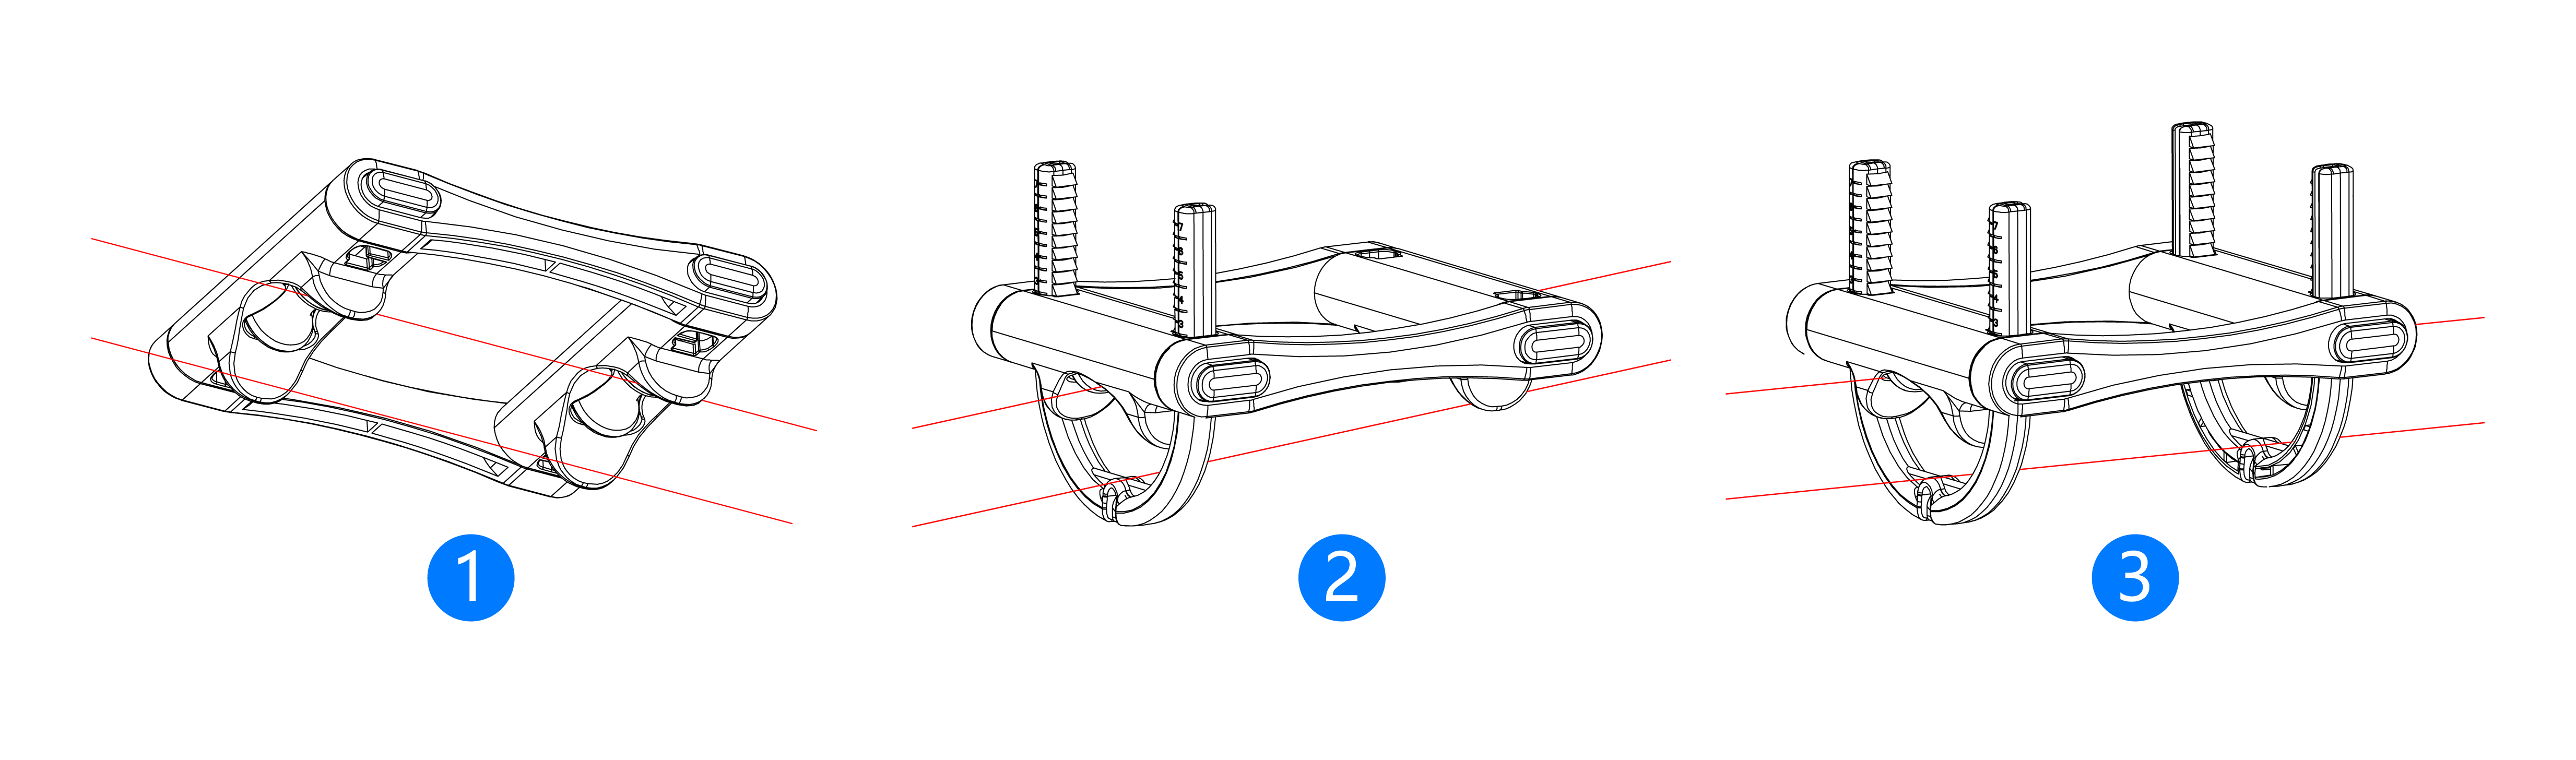
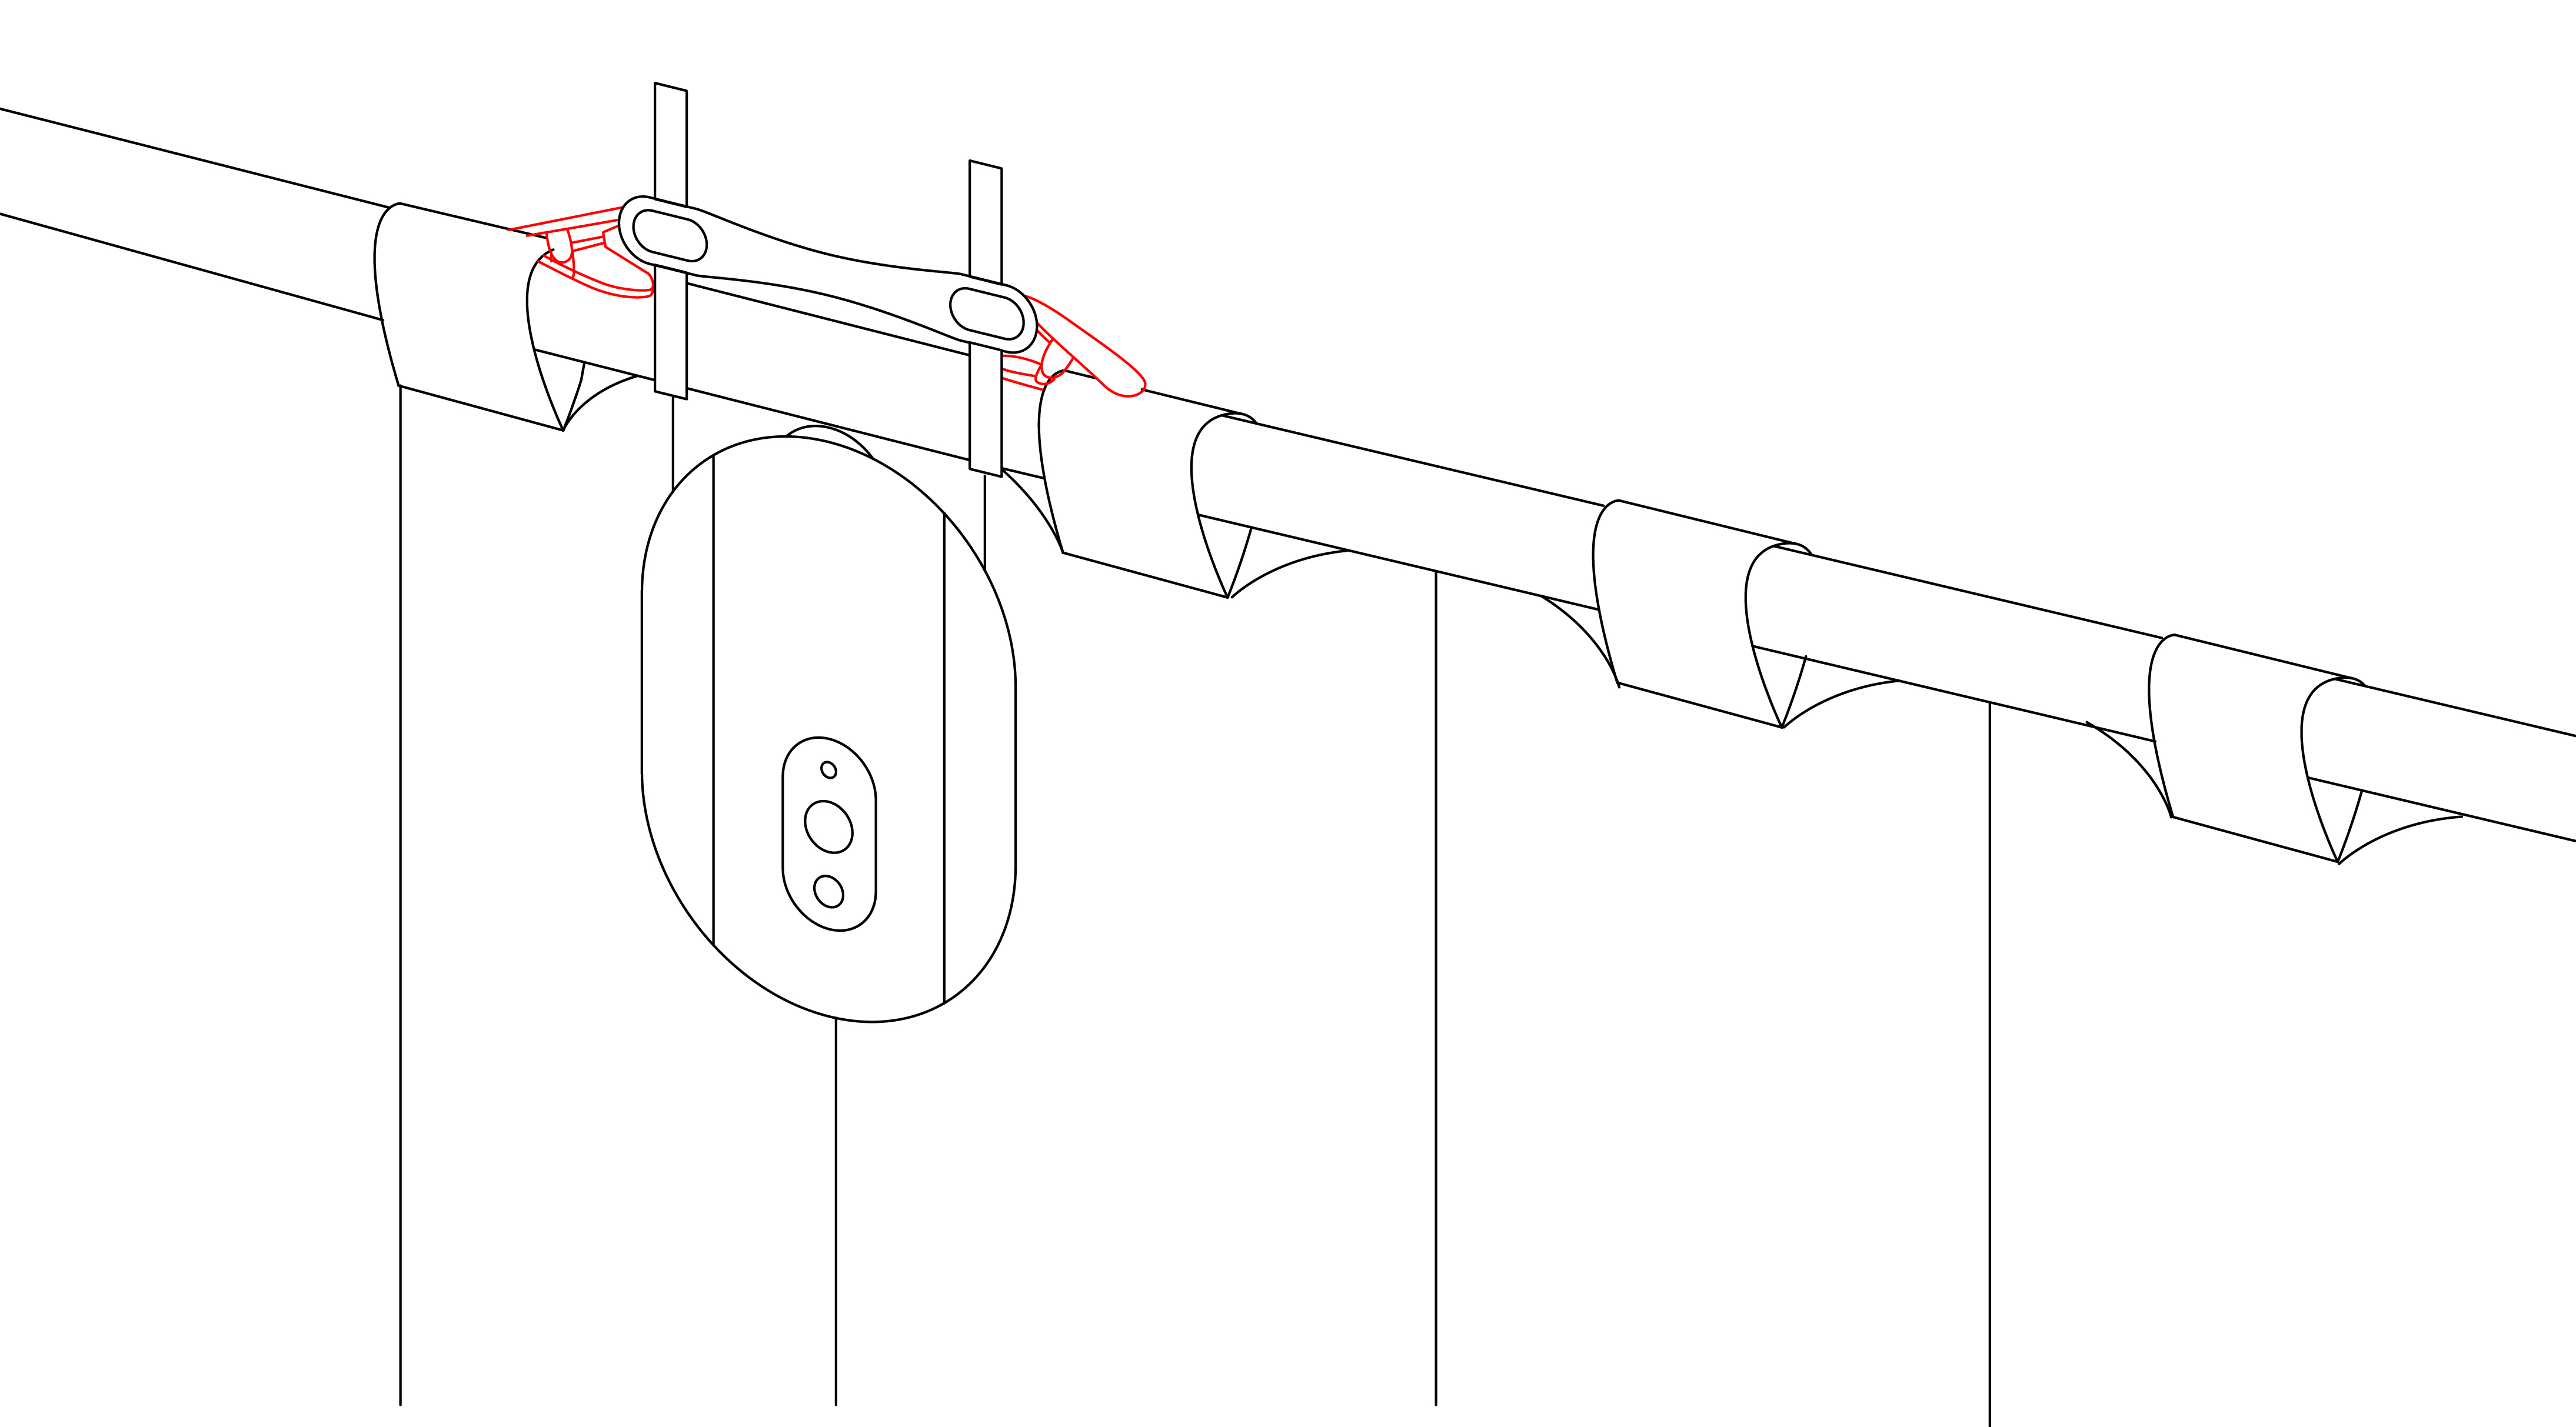
1. When placing the Roman rod accessory, ensure the rollers are facing downward and place it steadily on the Roman rod.
2. Align the reserved holes on the main body accurately, press the adjustment button, and install the U-shaped slider.
3. Fix one side first, then secure the other end. Both sides must be firmly locked to ensure that the accessory does not move left or right after installation, achieving a stable connection.
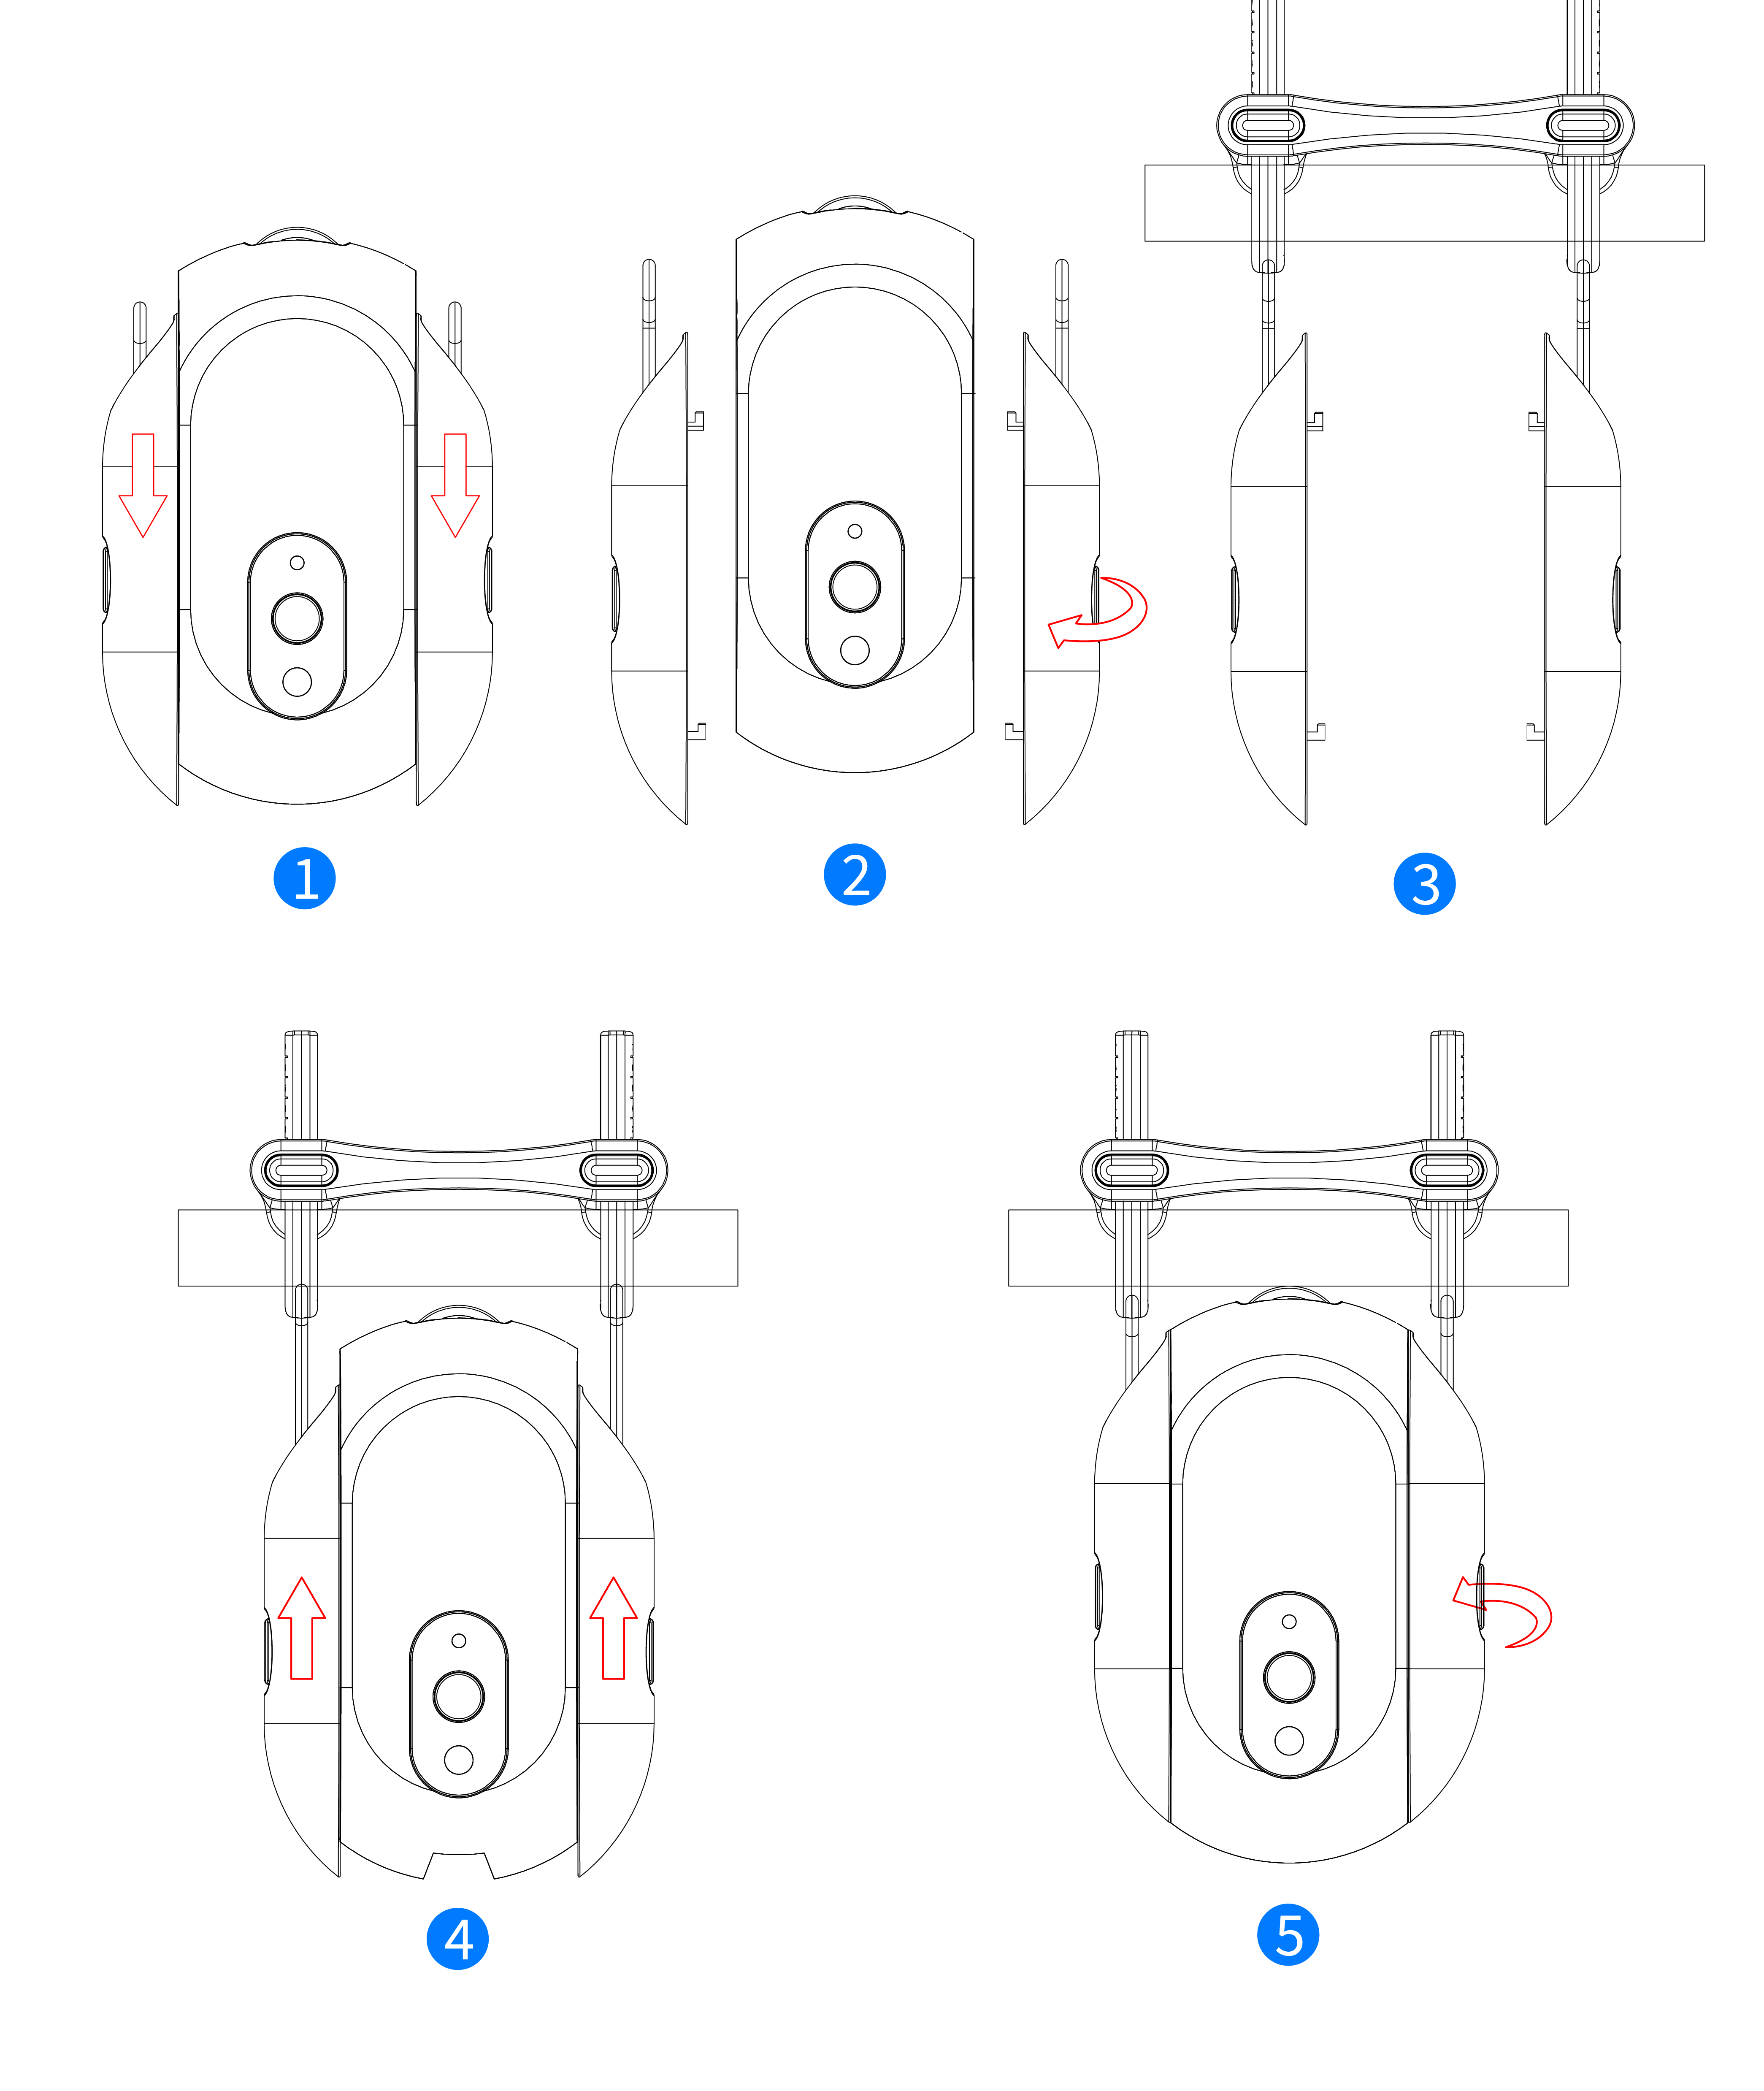
1. Slide the curtain robot main body downwards to remove the hooks on both sides.
2. Adjust the hooks to the top position using the side knobs.
3. Install the hooks on both sides to the corresponding curtain rings.
4. Combine the curtain robot main body with the hooks on both sides.
5. Adjust the side knobs to ensure the top rollers of the curtain robot fit closely with the curtain track.
Tip: During installation, tilt the curtain robot to the left or right to adjust the knobs on both sides for proper tightness.
Grommet Curtains: For grommet curtains, the minimum distance between two adjacent Roman rings must be greater than 100mm.

Installation Guide (Applicable to Grommet Curtains Only)
The following instructions are specifically for grommet curtains. If you are using pinch pleated curtains, please skip this section.
Installation Steps:
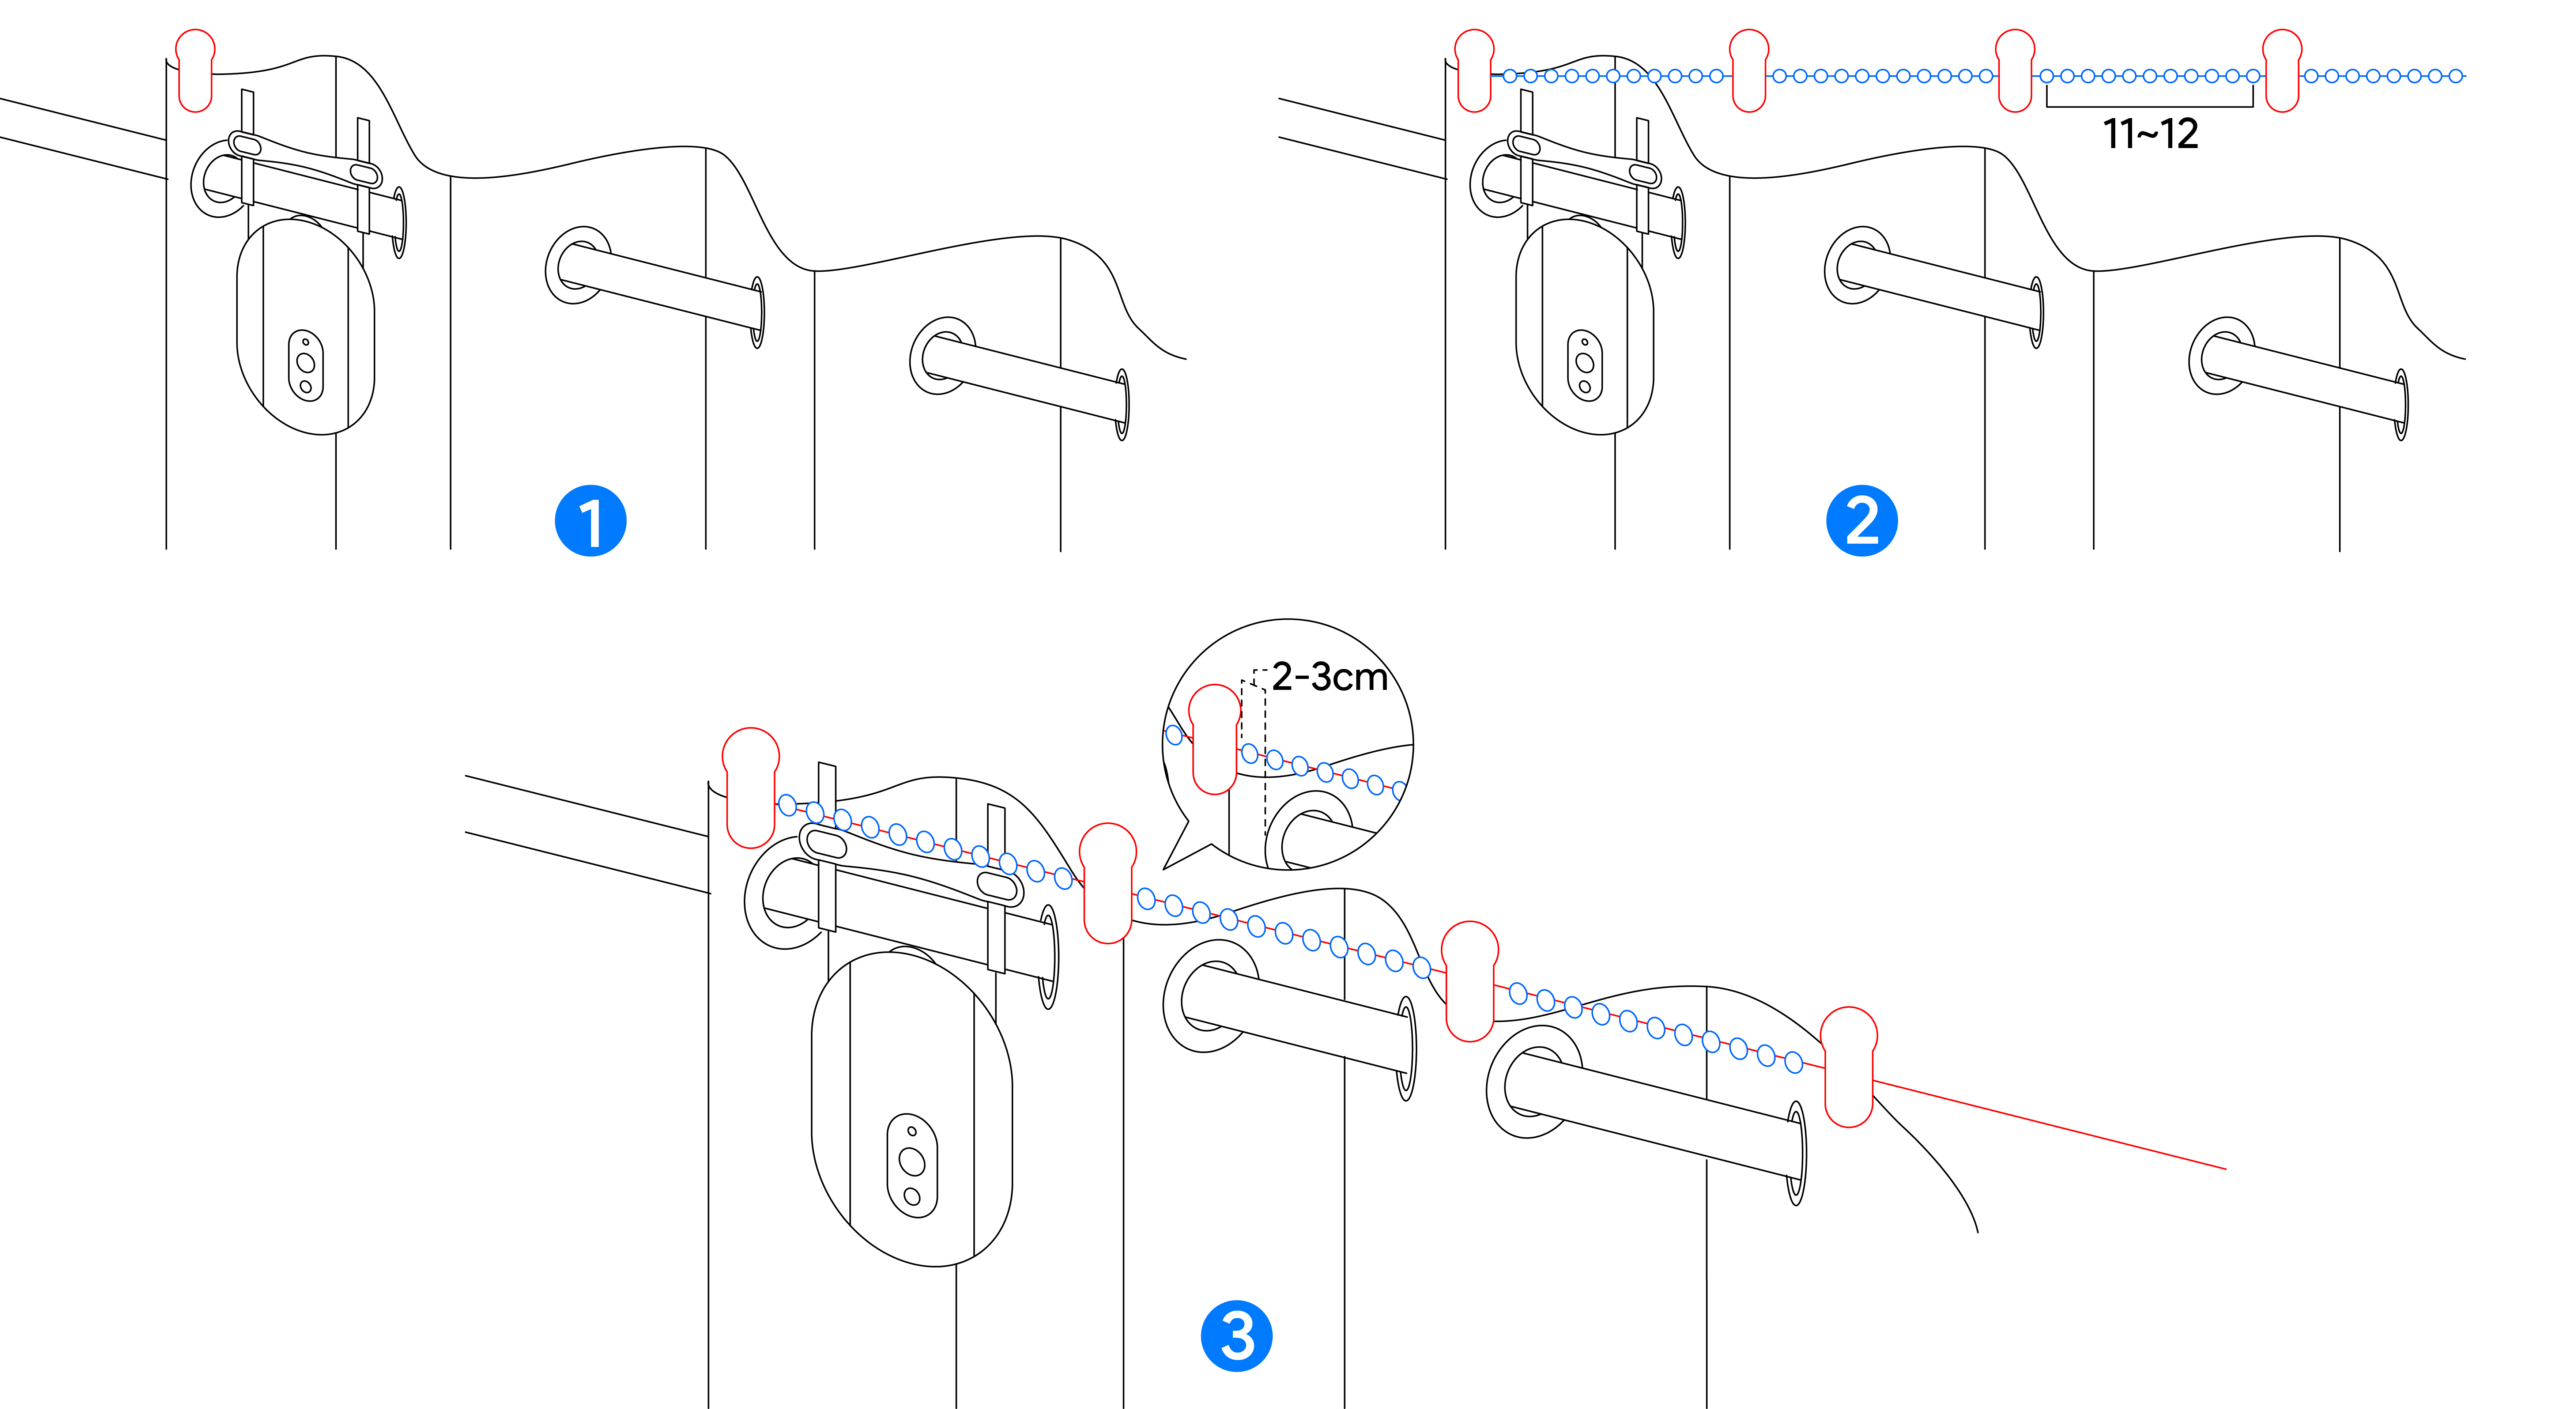
1. Initial Positioning: For a 100mm grommet curtain, place the first clip at the starting edge near the CurtainBot.
2. Securing the Clips: Starting from the first clip, attach one clip every 11-12 beads. Ensure each clip is firmly secured on the curtain.
3. Adjusting Clip Placement: After securing the clips, adjust their positions as shown in the reference diagram.
Important: From the second clip onward, maintain a 2-3cm distance between the clip and the curtain rings.
4. Custom Adjustments: The provided diagram serves as a reference. Users may adjust the setup according to their specific needs to achieve the best installation outcome.
Notes:
1. Ensure Firm Attachment: Confirm that each clip is securely attached to the curtain to prevent slipping or detachment.
2. Maintain Consistent Spacing: Keep the spacing between clips as uniform as possible for a neat and aesthetic appearance.
3. Avoid Excessive Stretching: During installation, avoid overstretching the curtain to preserve its durability.
By following the above steps, you can successfully install grommet curtains. If you have any questions or require further assistance, please contact customer support.
Pinch Pleat Curtains: For pinch pleat curtains, the thickness of the hang ring must be greater than 4mm.

Tab Top Curtains; The following instructions are for tab top curtains. Follow these steps carefully to prevent the curtain tabs from being pulled into the Roman rod system.
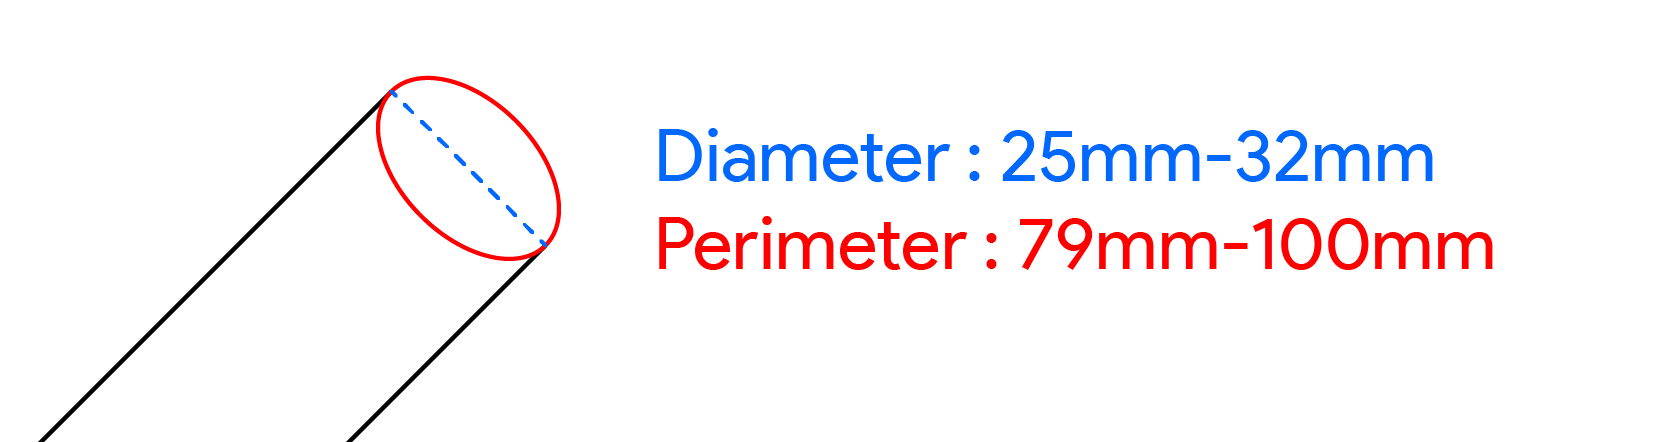
Roman Rod Diameter: The diameter should be between 25-38mm, or the circumference should be between 79-100mm. Either option is acceptable
Note: This product is only suitable for Roman rods with uniform thickness on both sides and not for telescopic Roman rods with varying thicknesses at the ends.

Main Body Dimensions: 102*80*25mm
Main Body Weight: 56g
U-shaped Slider Dimensions: 70*60*8mm
U-shaped Slider Weight: 16g
Package Contents: Main Body x1, U-shaped Slider x2, Bead Chain x1 , Clip x10