ADFBZ531 Fingerbot Plus User Manual
User Manual

English

.png)
The ADFBZ531 Fingerbot can press buttons or switches through a mechanical arm, helping users connect existing home appliances, office equipment, or other button-operated devices to smart control scenarios. Users can trigger actions, adjust mechanical arm operating parameters in the Smart Life App, and use a compatible Tuya Zigbee gateway for remote control, scheduled control, and automation linkage.
The Fingerbot (Zigbee) is the world's smallest robot capable of intelligently controlling different buttons and switches. You can use it to click and control your existing home appliances. With the Fingerbot, you can schedule to turn on your coffee maker, activate your vacuum cleaner through voice commands, remotely turn on your office PC, and more. These tasks have now become effortless with the Fingerbot.
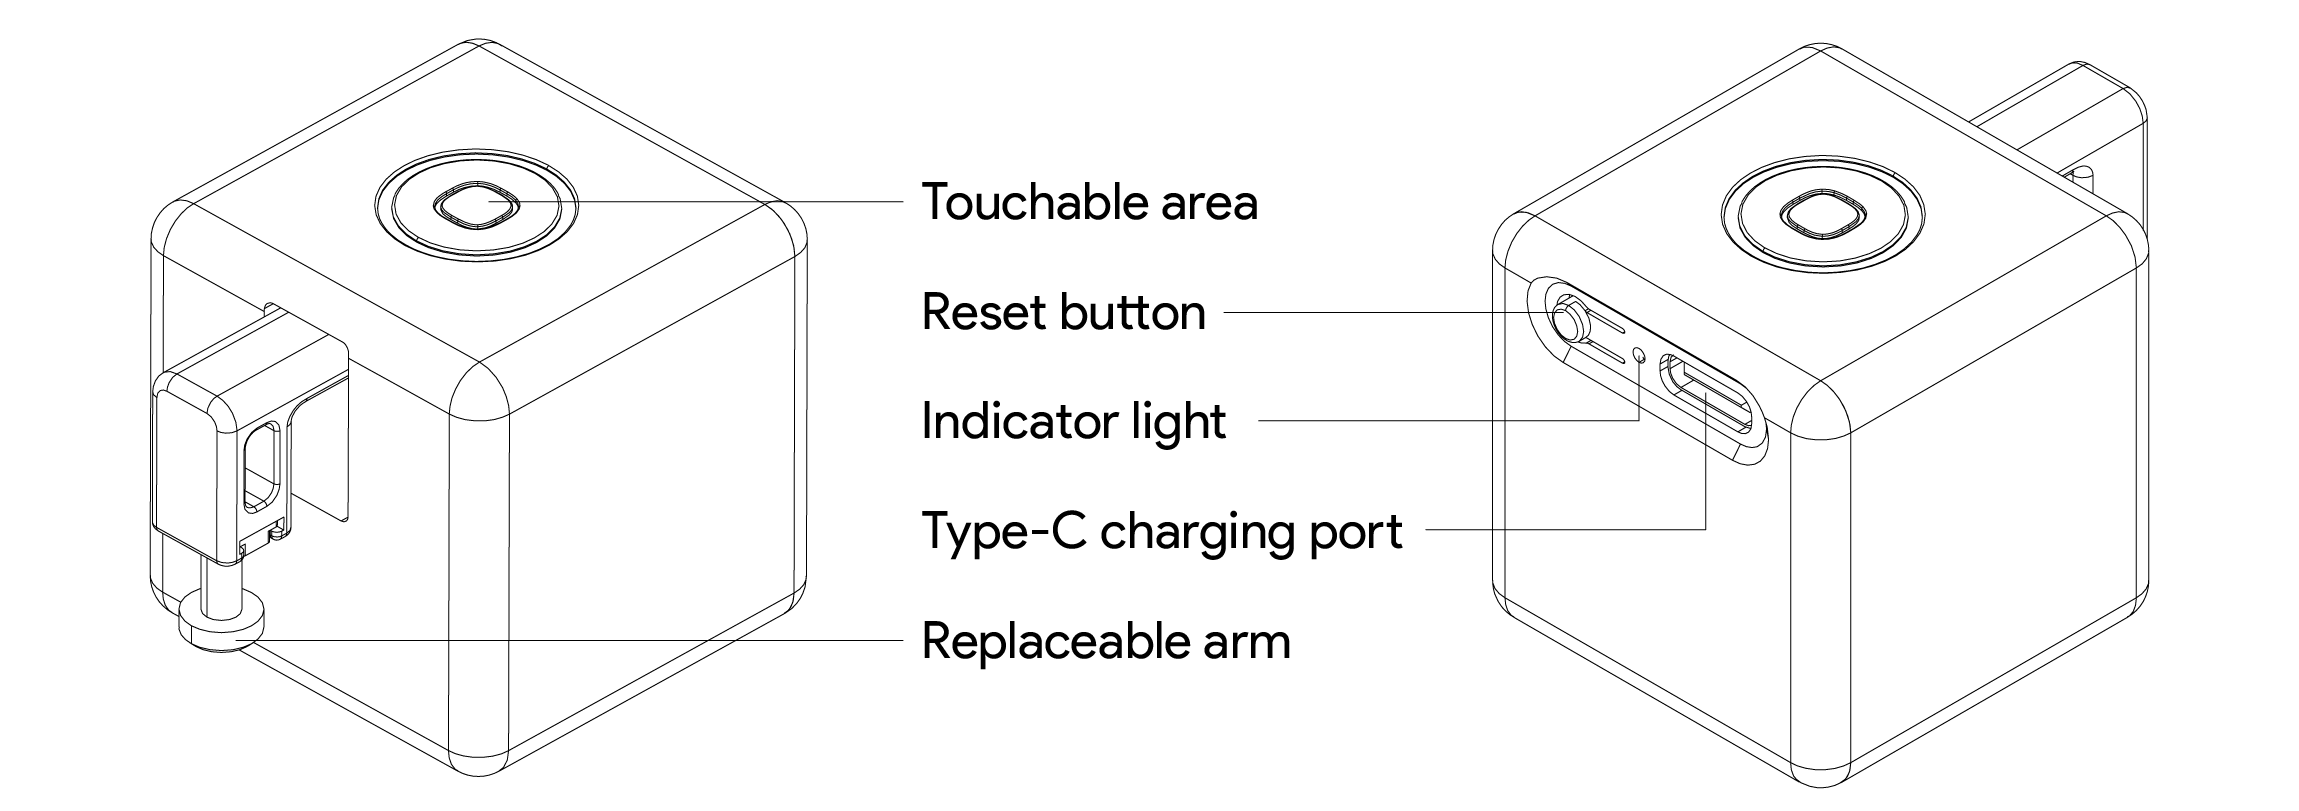
Fingerbot main unit × 1: ADFBZ531
3M double-sided adhesive × 2: Used to secure the main unit
Product user manual × 1: Printed manual
Type-C cable × 1: Used for charging
Search for “Smart Life” in the mobile app store and install the App. After installation, log in or create an account, and follow the App page instructions to add the device.


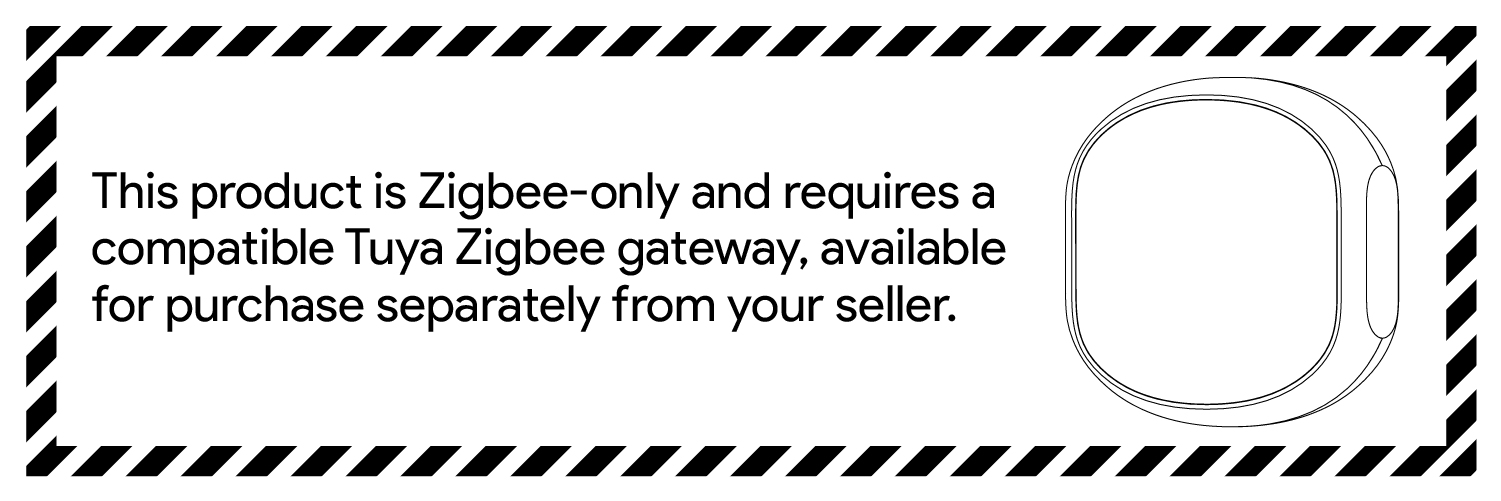
ADFBZ531 is a Zigbee device and must be used with a compatible Tuya Zigbee gateway. Before adding the Fingerbot, make sure the Zigbee gateway has been added to the Smart Life App and is connected normally.
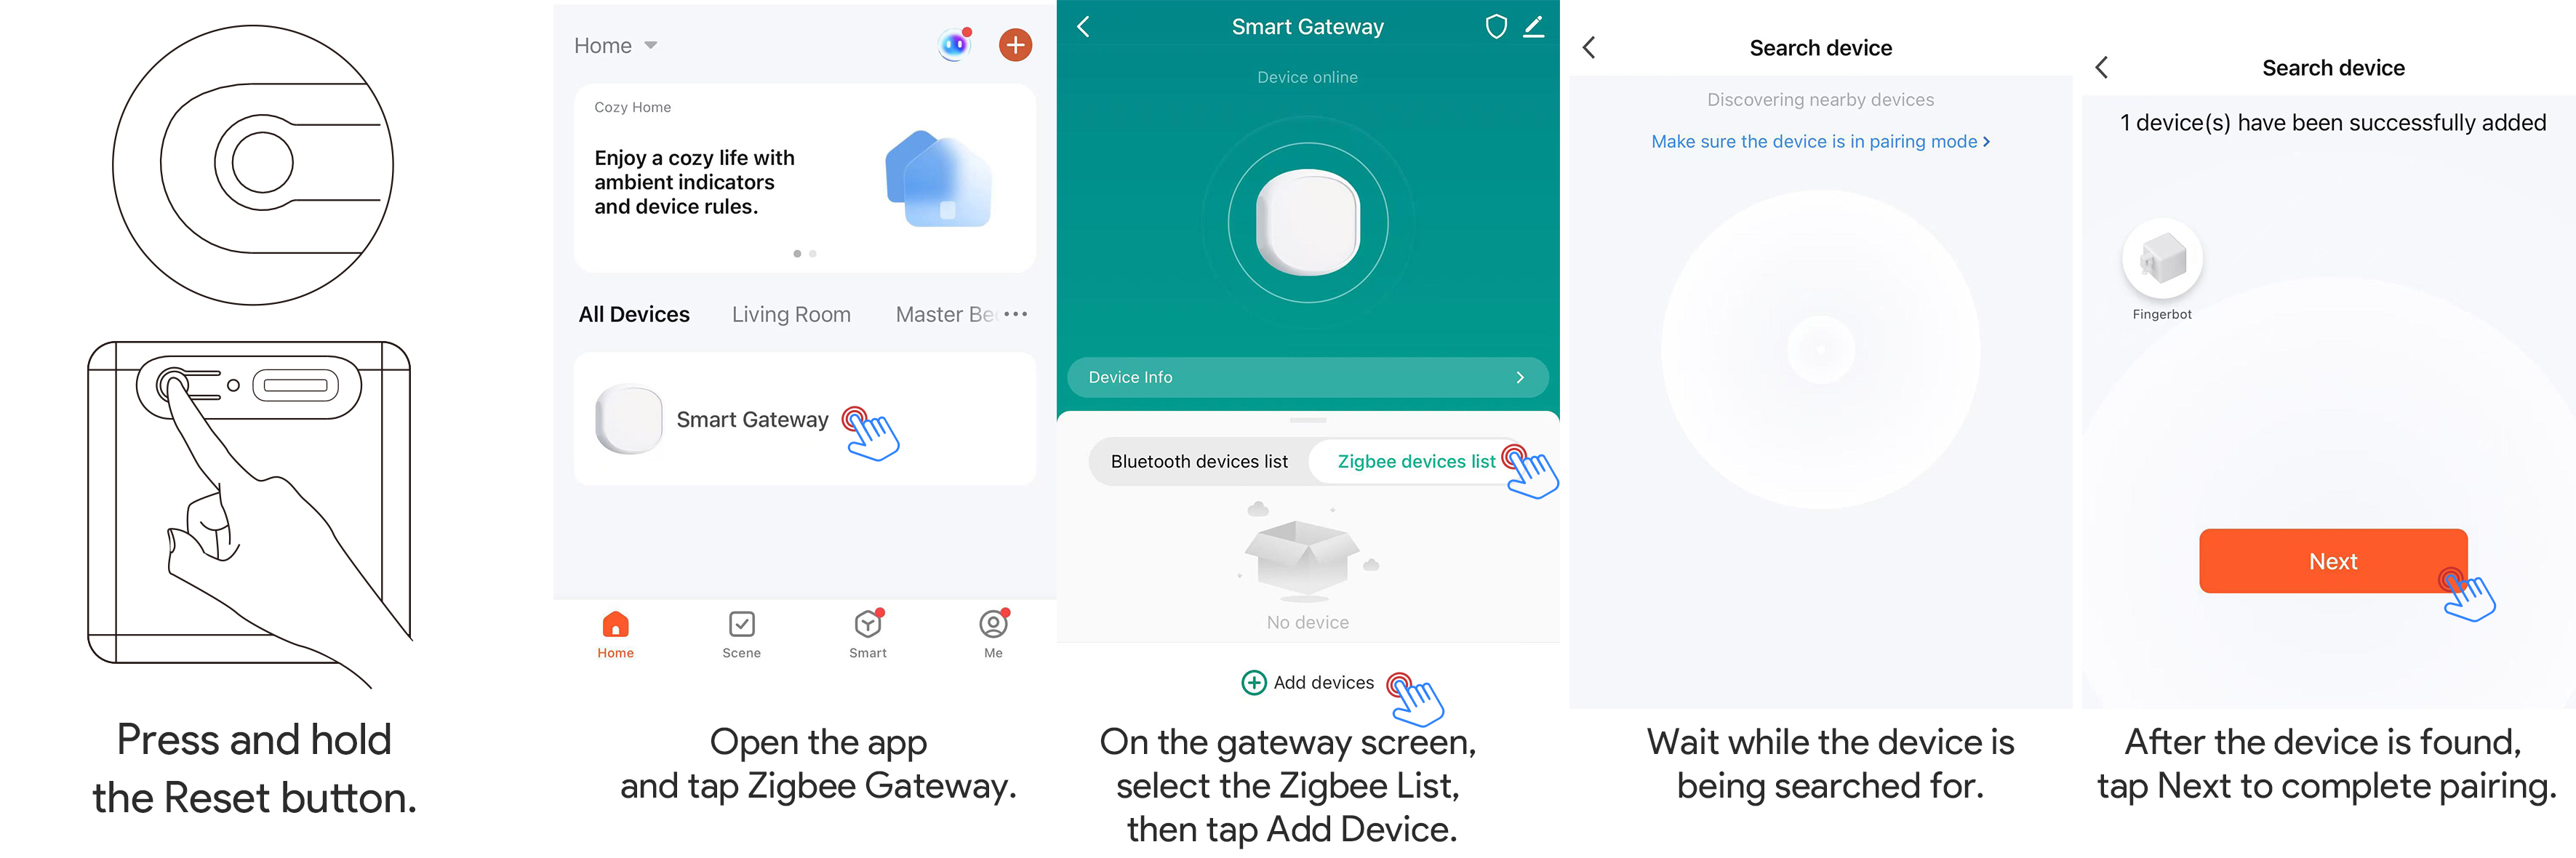
1. Open the Smart Life App and confirm that the Zigbee gateway is online.
2. Enter the gateway page or the App’s add-device page.
3. Follow the App page instructions to add a Zigbee sub-device.
When adding the device for the first time or binding it to a different account, first put the device into pairing mode.
1. Confirm that the device has sufficient battery power. If the battery is low, charge the device with a Type-C cable first.
2. Press and hold the device reset button for about 5 seconds.
3. When the blue indicator light starts flashing, the device enters pairing mode.
4. Open the Smart Life App and tap “+” in the upper-right corner.
5. Tap “Add Device”, select the add-sub-device process under the Zigbee gateway, and follow the App page instructions to complete pairing.
After entering the device control panel, tap the Fingerbot action button. When communication between the gateway and device is normal, the device action is usually triggered within 2 seconds.
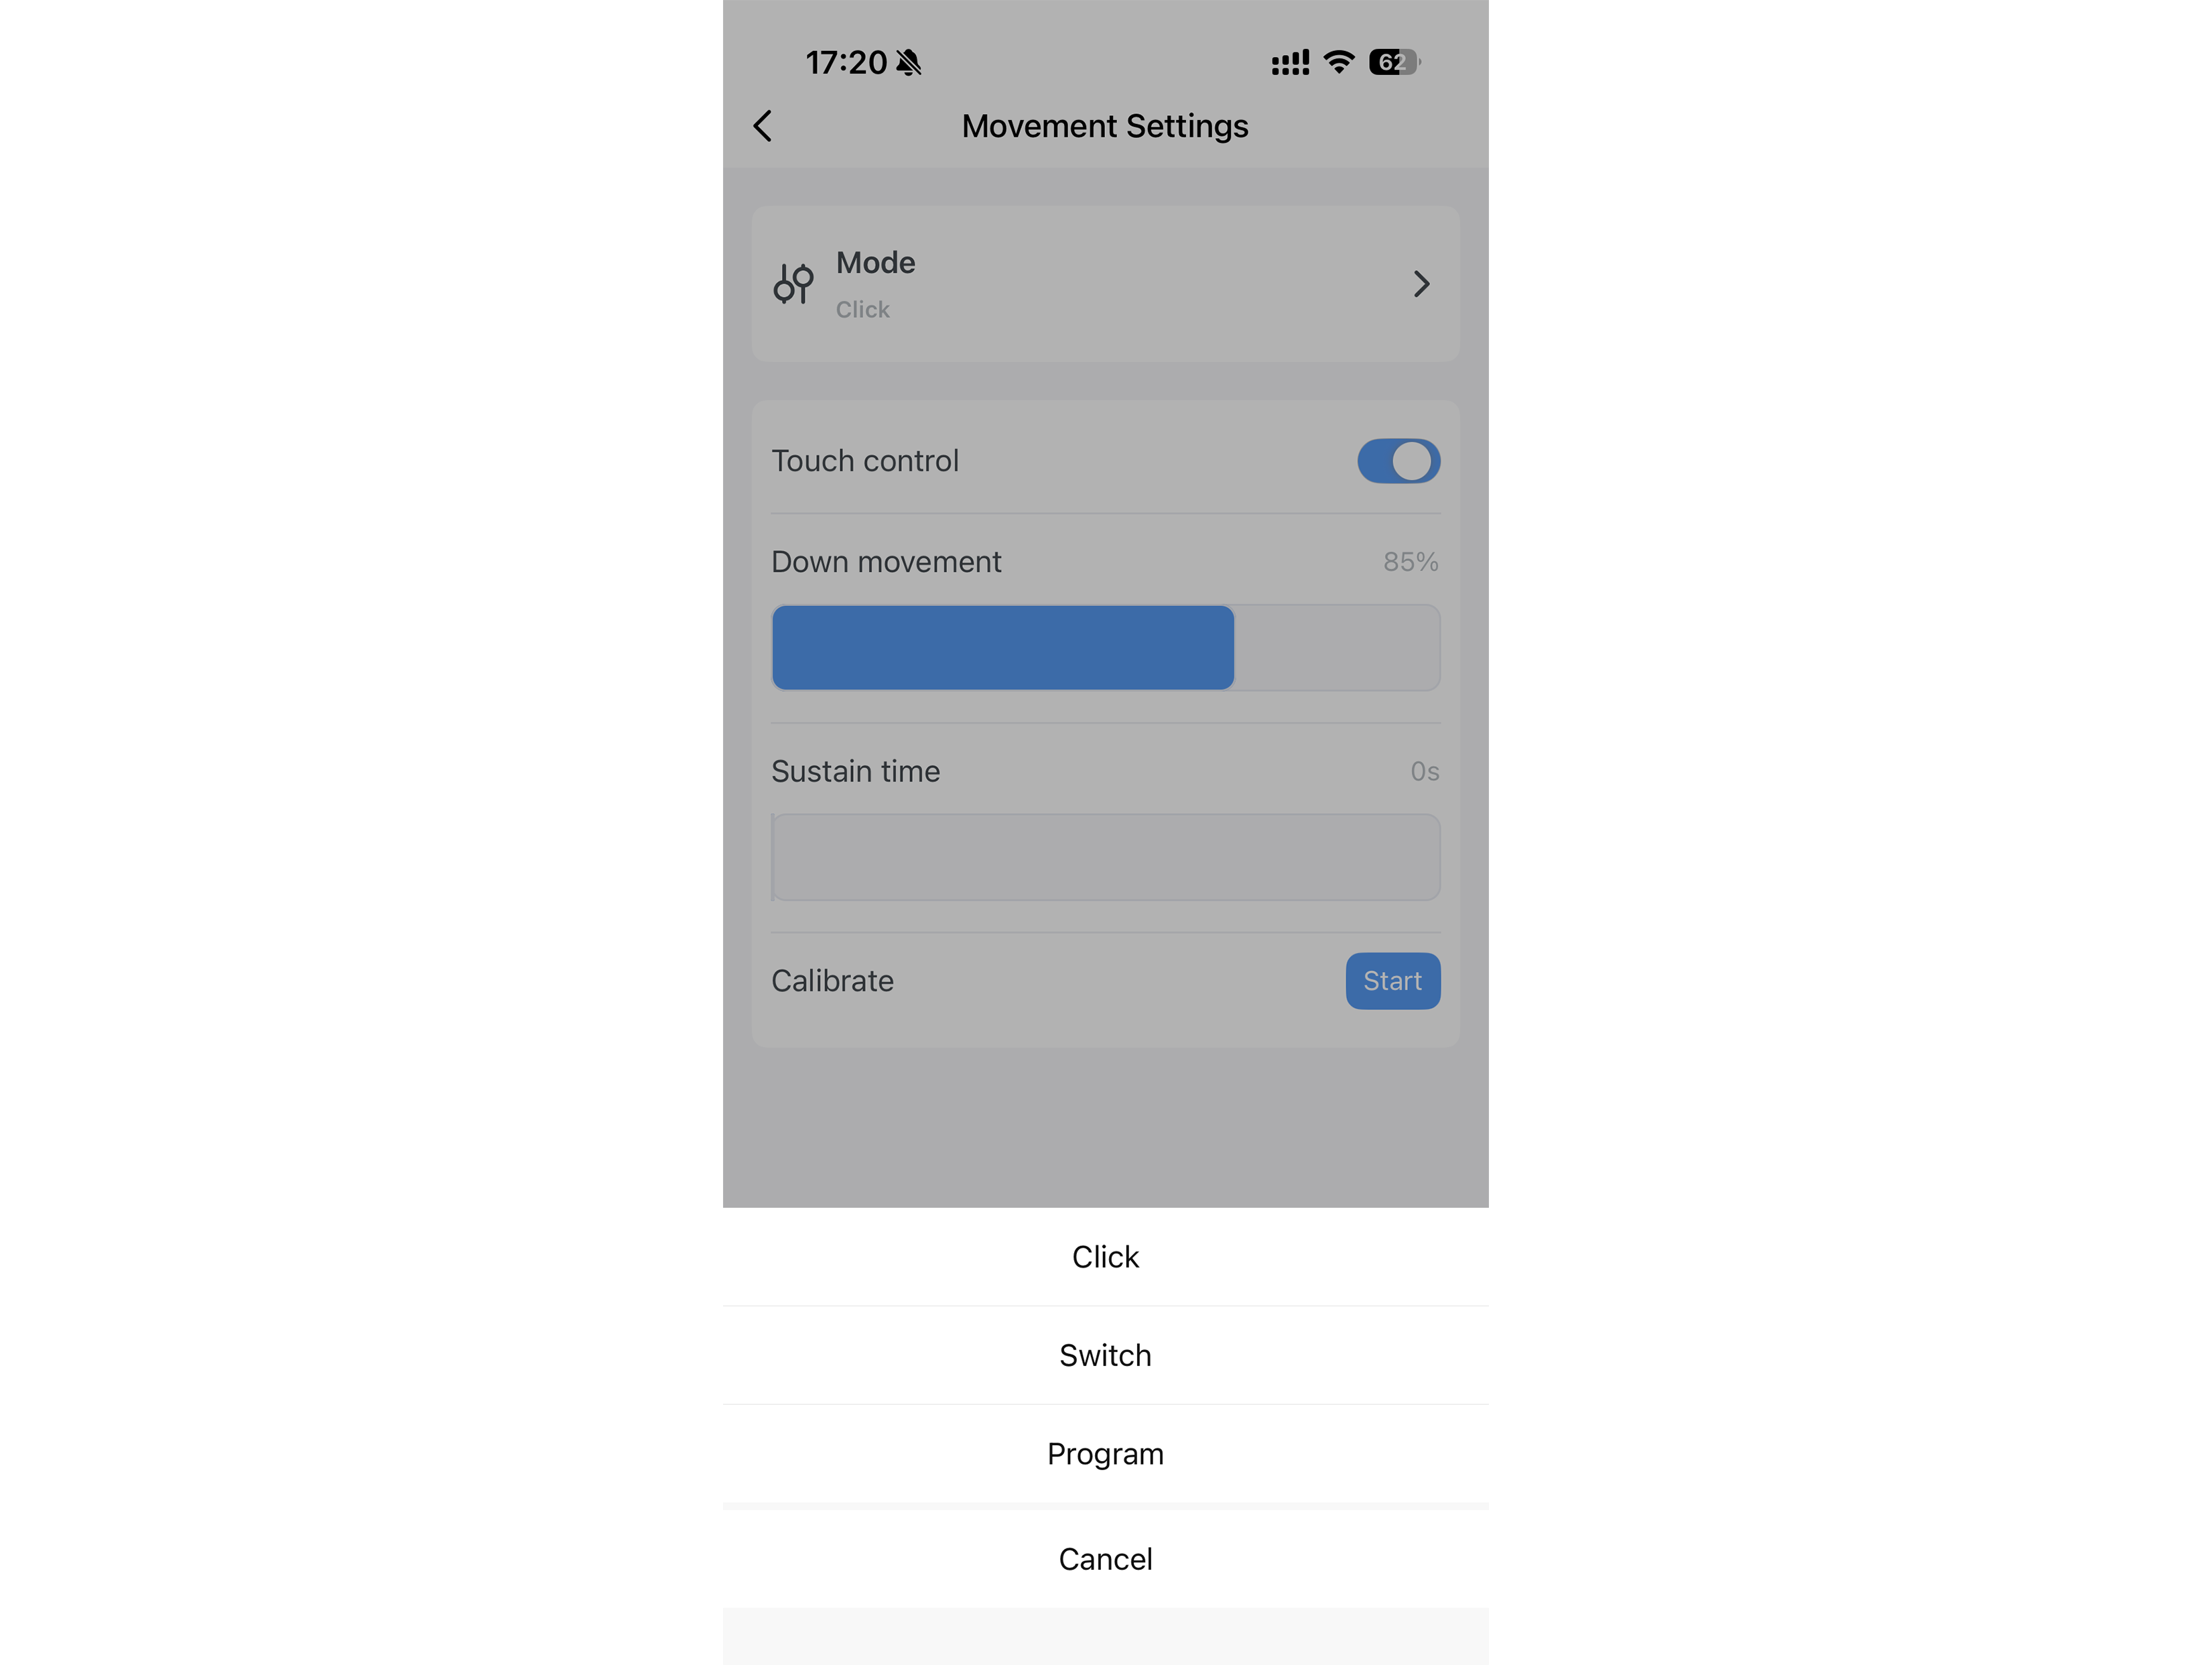
The device firmware supports the following operating modes:
Mode: The mechanical arm presses down and automatically returns to the initial position
Switch mode: The mechanical arm switches between the on and off positions
Programming mode: Runs according to a preset action sequence, supporting up to 8 action steps
Before use, adjust the mechanical arm operating parameters in the device control panel, such as mode selection, upward movement, downward movement, hold time, mechanical arm direction, and touch control. Parameters should be set according to the actual button height and required pressing force.
Note: Incorrect operating parameter settings may cause abnormal product operation, mechanical arm obstruction, or shortened product life. To ensure stable operation, wait at least 10 seconds after each click before performing the next operation.
ADFBZ531 supports schedules, countdowns, and automation scenes through the Smart Life App.
It can be used for the following scenarios:
• Pressing buttons on coffee machines, robot vacuums, air purifiers, and other devices at scheduled times.
• Triggering press actions based on Smart Life App scene conditions.
• Executing specified actions in switch mode or programming mode.
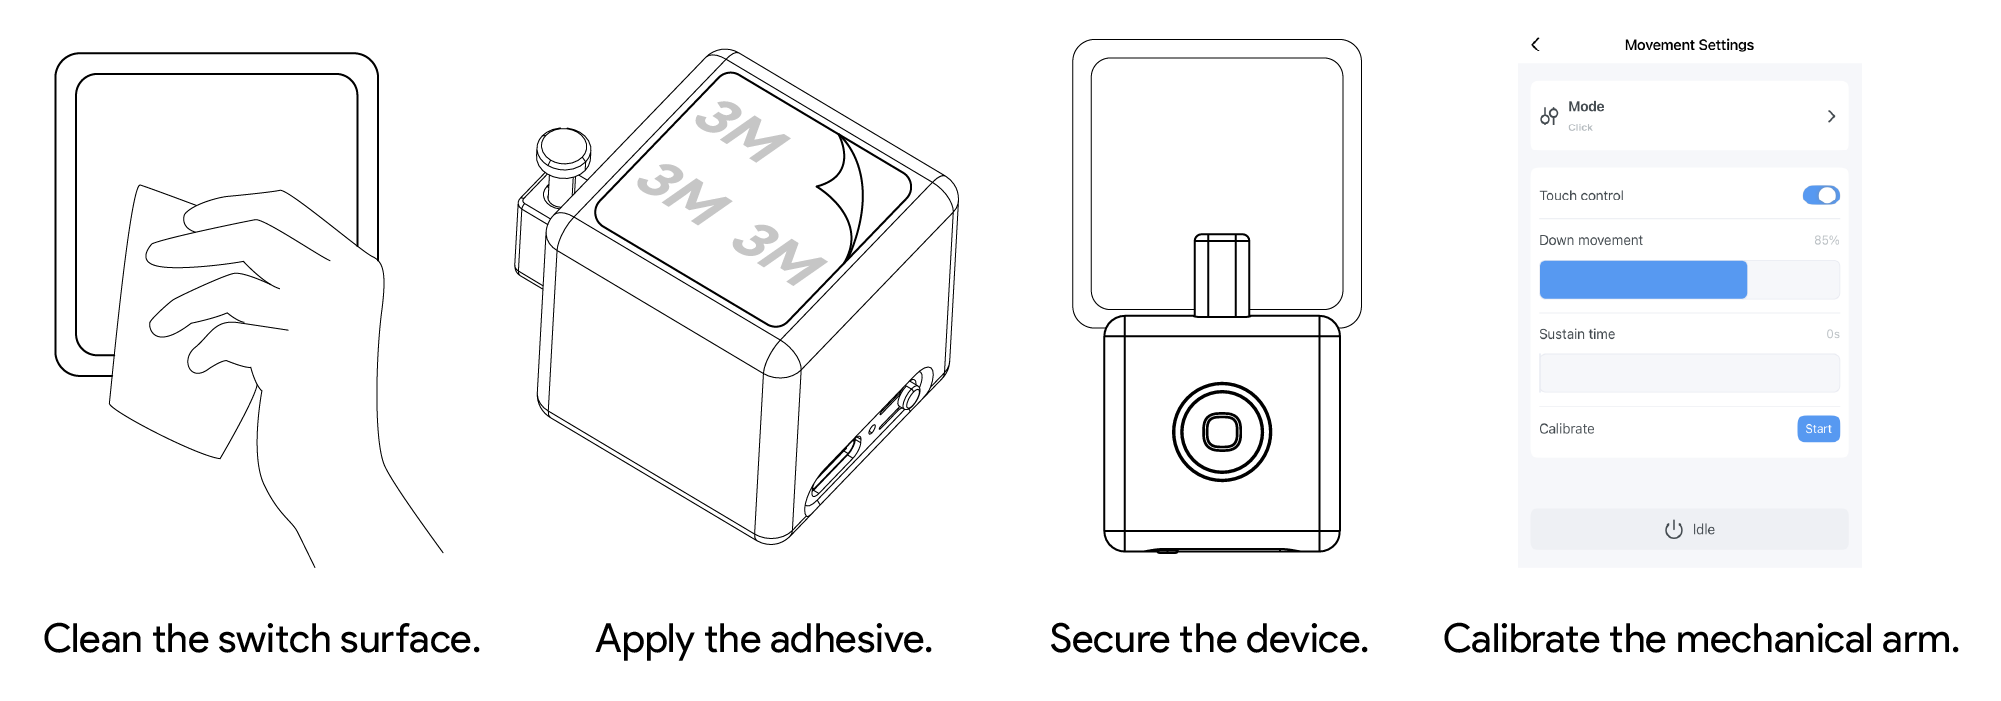
1. Clean the installation surface and make sure it is dry, flat, and free of dust and oil.
2. Use the included double-sided adhesive to secure the Fingerbot to the target panel.
3. Pair the device with the Smart Life App.
4. Calibrate the mechanical arm movement range according to the target button position. The “downward movement” parameter should be set so that the mechanical arm can press the button properly.
5. After installation, let it stand for 24 hours to achieve better adhesion.
Note: Incorrect movement settings may create extra resistance and shorten the device service life. Do not let the mechanical arm press against a button or other obstacle for a long time.
ADFBZ531 is a rechargeable device. Use a Type-C cable to charge the device. The recommended input specification is 5V-1A. Keep the port dry during charging and avoid charging in humid or high-temperature environments.
When the App shows low battery, or when the mechanical arm does not move as expected, charge the device first. After charging is complete, perform control, calibration, or installation debugging.
Charging port: Type-C
Recommended input: 5V-1A
Battery capacity: 400mAh (to be confirmed by hardware)
Battery type: Rechargeable lithium battery
Battery level display: Supported
Low-battery threshold: To be confirmed by hardware
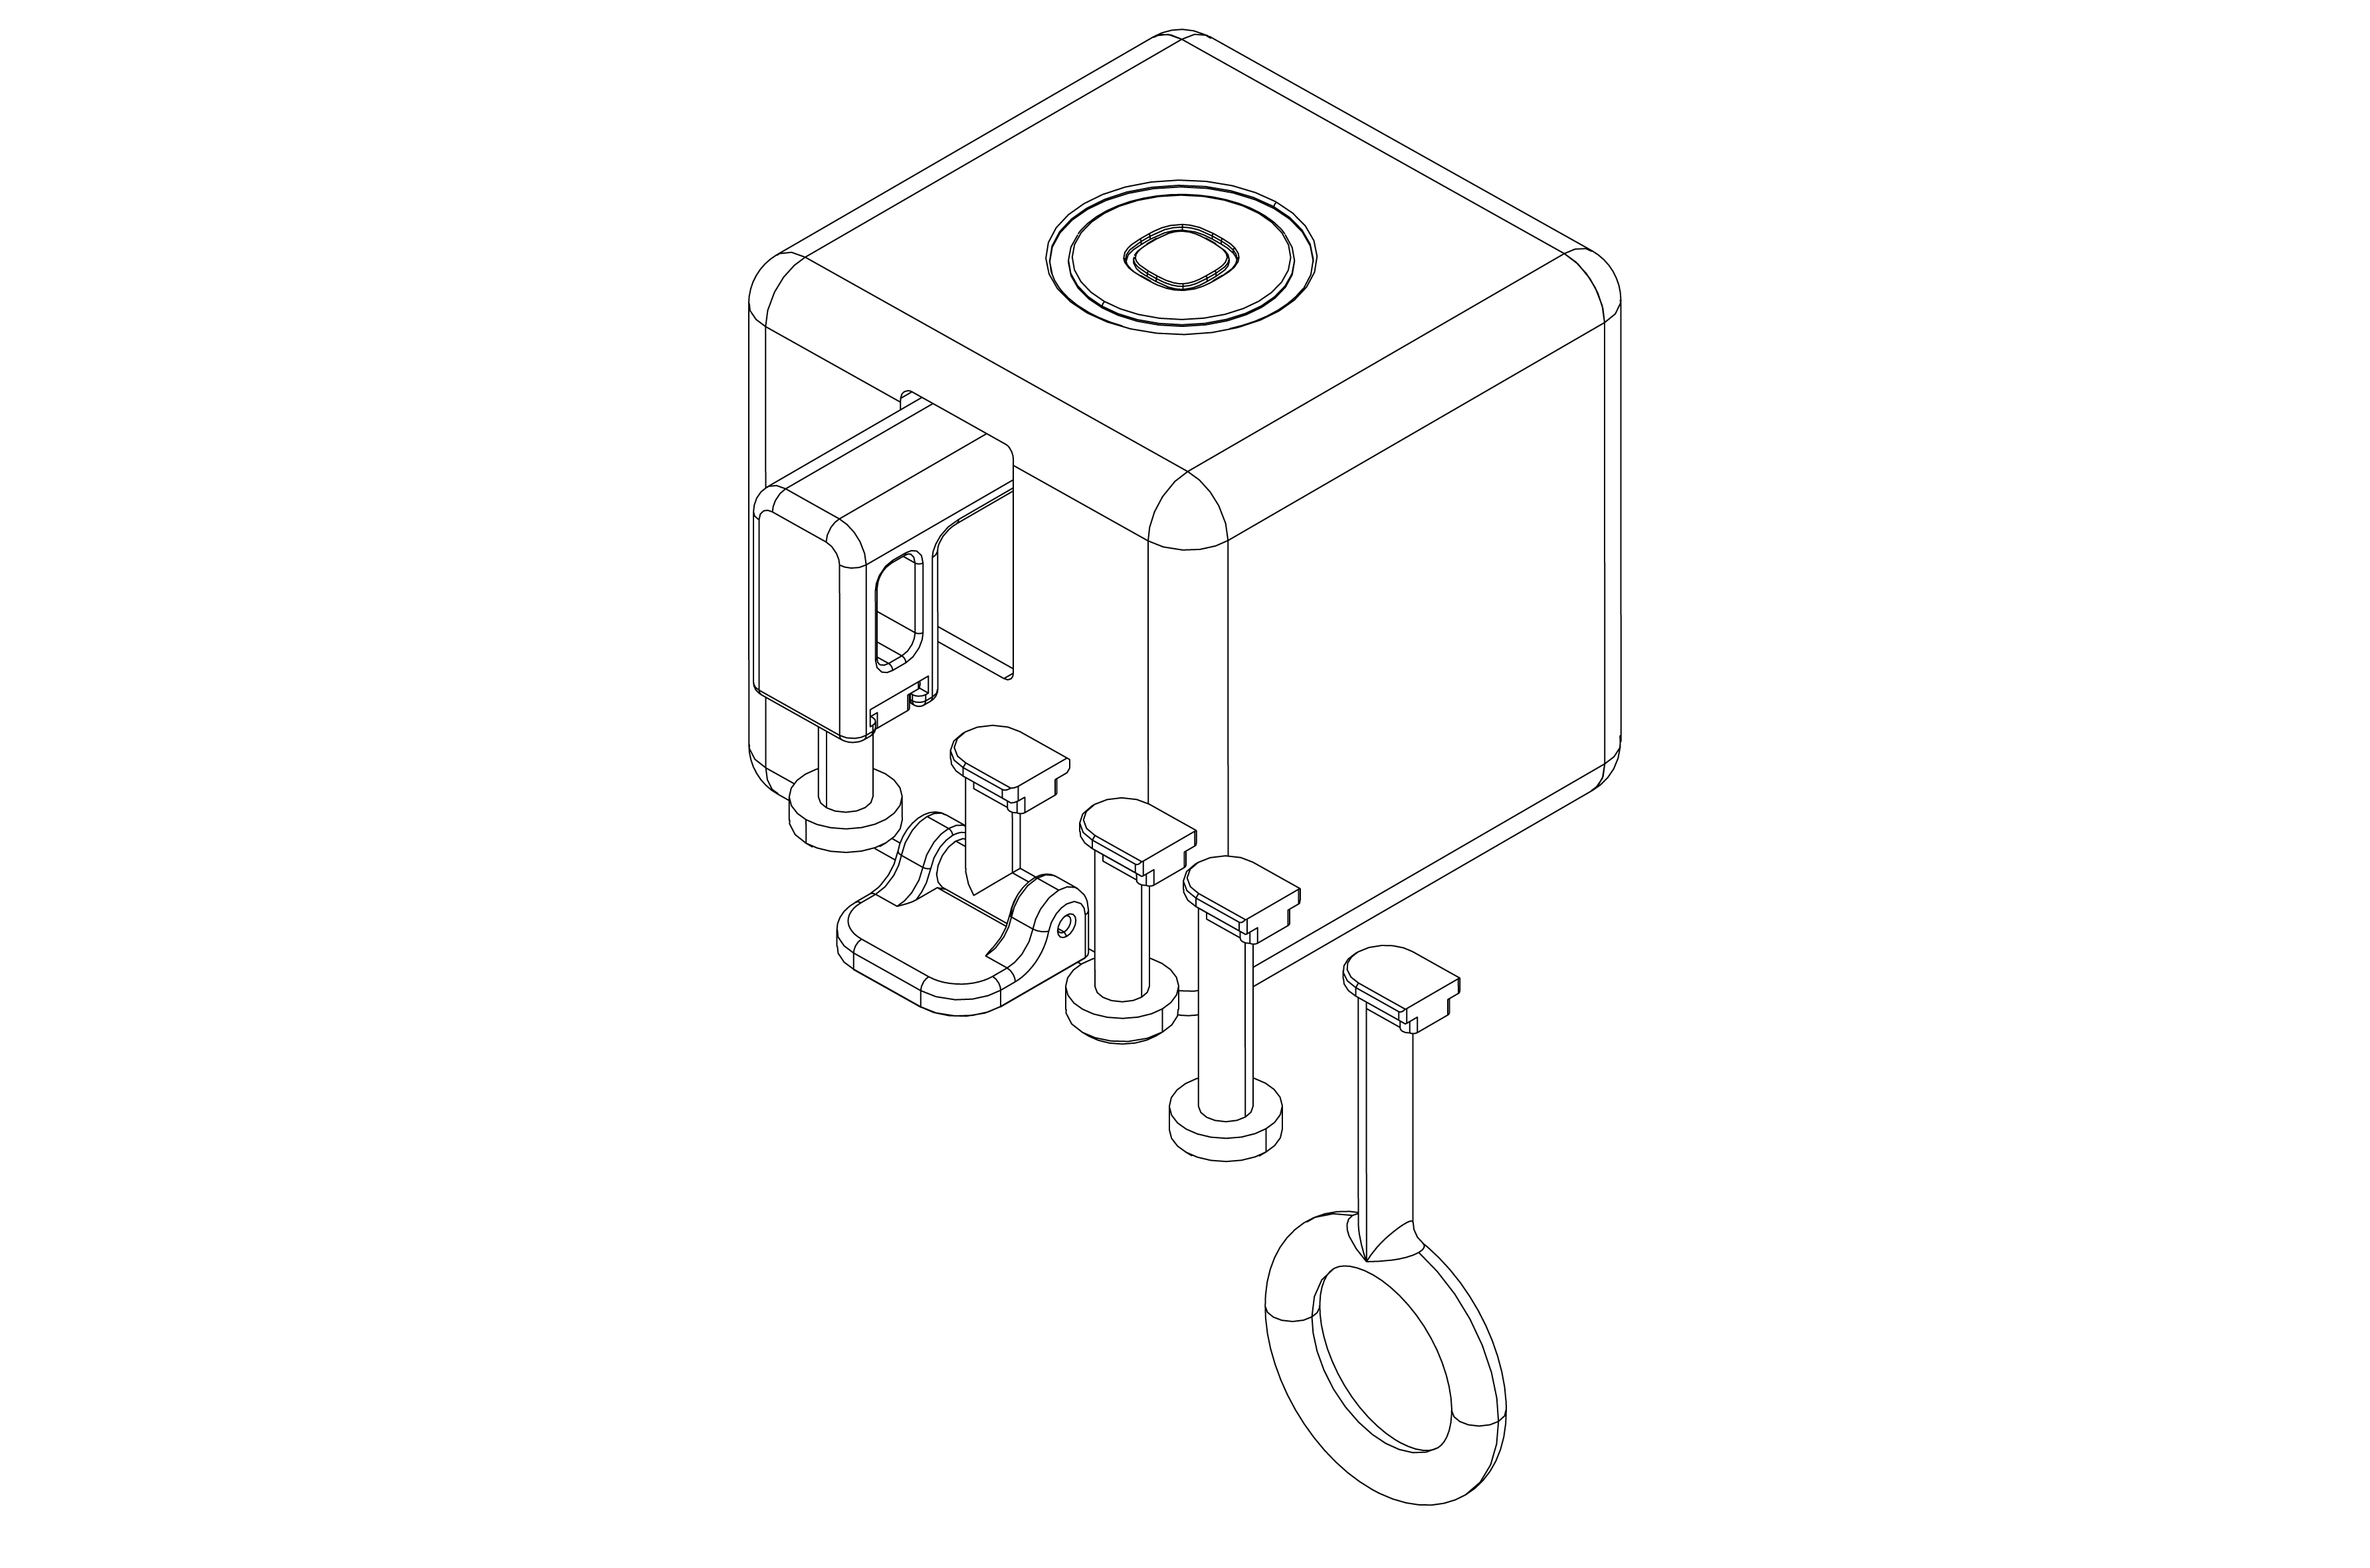
ADFBZ531 uses a modular mechanical arm design. The mechanical arm can be replaced according to different button or switch scenarios. Whether spare mechanical arms and a tool kit are included in the package is subject to the actual package.
Before replacing the mechanical arm, stop device actions first. Do not remove or install the mechanical arm while it is operating.
• This product is not waterproof. Do not install it on underwater equipment, in humid environments, or in locations where it may be splashed with water.
• This product contains a rechargeable lithium battery. Do not use, store, or charge it in high-temperature or humid environments or near fire sources.
• Do not obstruct the mechanical arm while the device is operating, otherwise the mechanical arm may fall off, the motor may be damaged, or the device may operate abnormally.
• Do not disassemble, impact, squeeze, or modify the device by yourself.
• Do not use this product in medical, life-safety, gas-control, or other high-risk scenarios.
• Keep the device and accessories out of reach of children to avoid accidental swallowing of small parts or unintended operation.
Product model: ADFBZ531
Product name: Fingerbot
Dimensions: 34.5 x 34.5 x 34.5 mm
Weight: 38 g
Maximum Mechanical Arm Travel: 12 mm
Pushing force: 10N
Wireless protocol: Zigbee 3.0
Gateway requirement: Requires a compatible Tuya Zigbee gateway
Charging port: Type-C
Recommended input: 5V-1A
Battery capacity: 400mAh
Battery type: Rechargeable lithium battery
Operating temperature: -10°C~45°C
Remote control: Implemented through a compatible Tuya Zigbee gateway
Waterproof rating: Not waterproof